Create a Workflow
PrerequisitesBefore creating a workflow, ensure that:
Steps to create A workflowFollow the steps below to create the above workflow:
Step : Open Workflow Builder
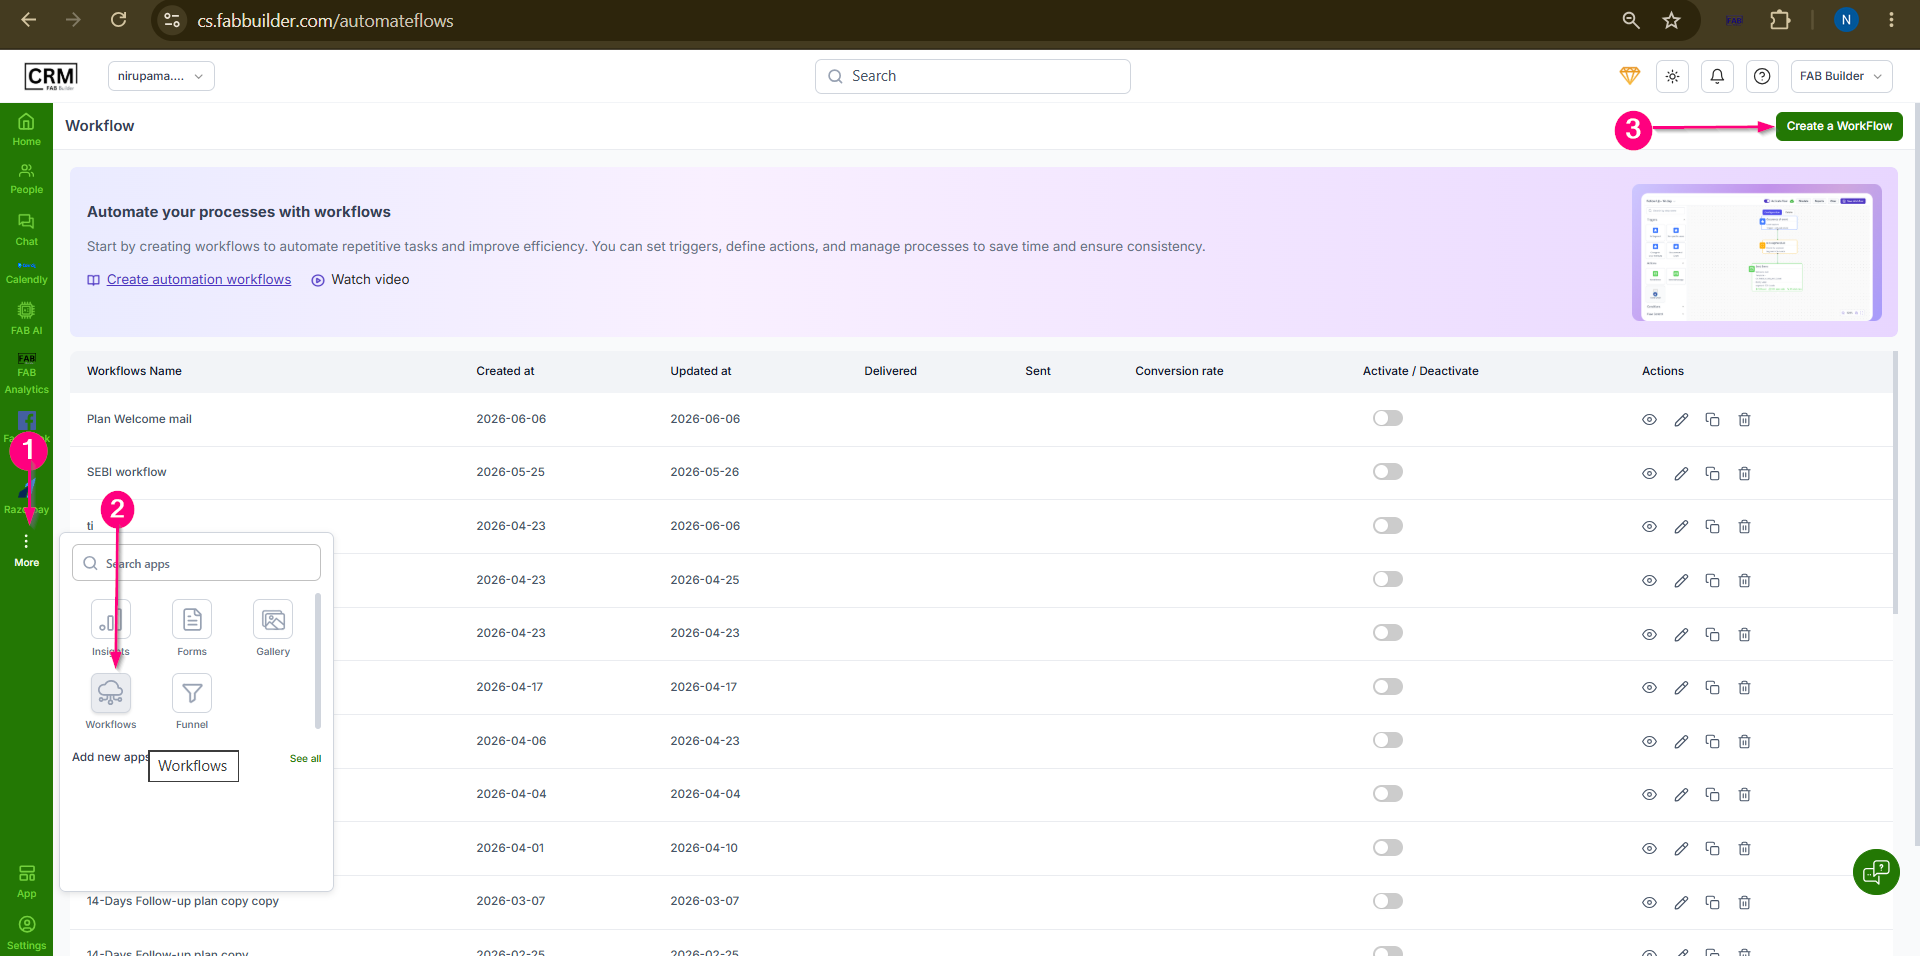 Screen- Create A workflow
Enter Workflow Name4.Select Create from Scratch or Create from Template.Here create from scratch method is selected and described. 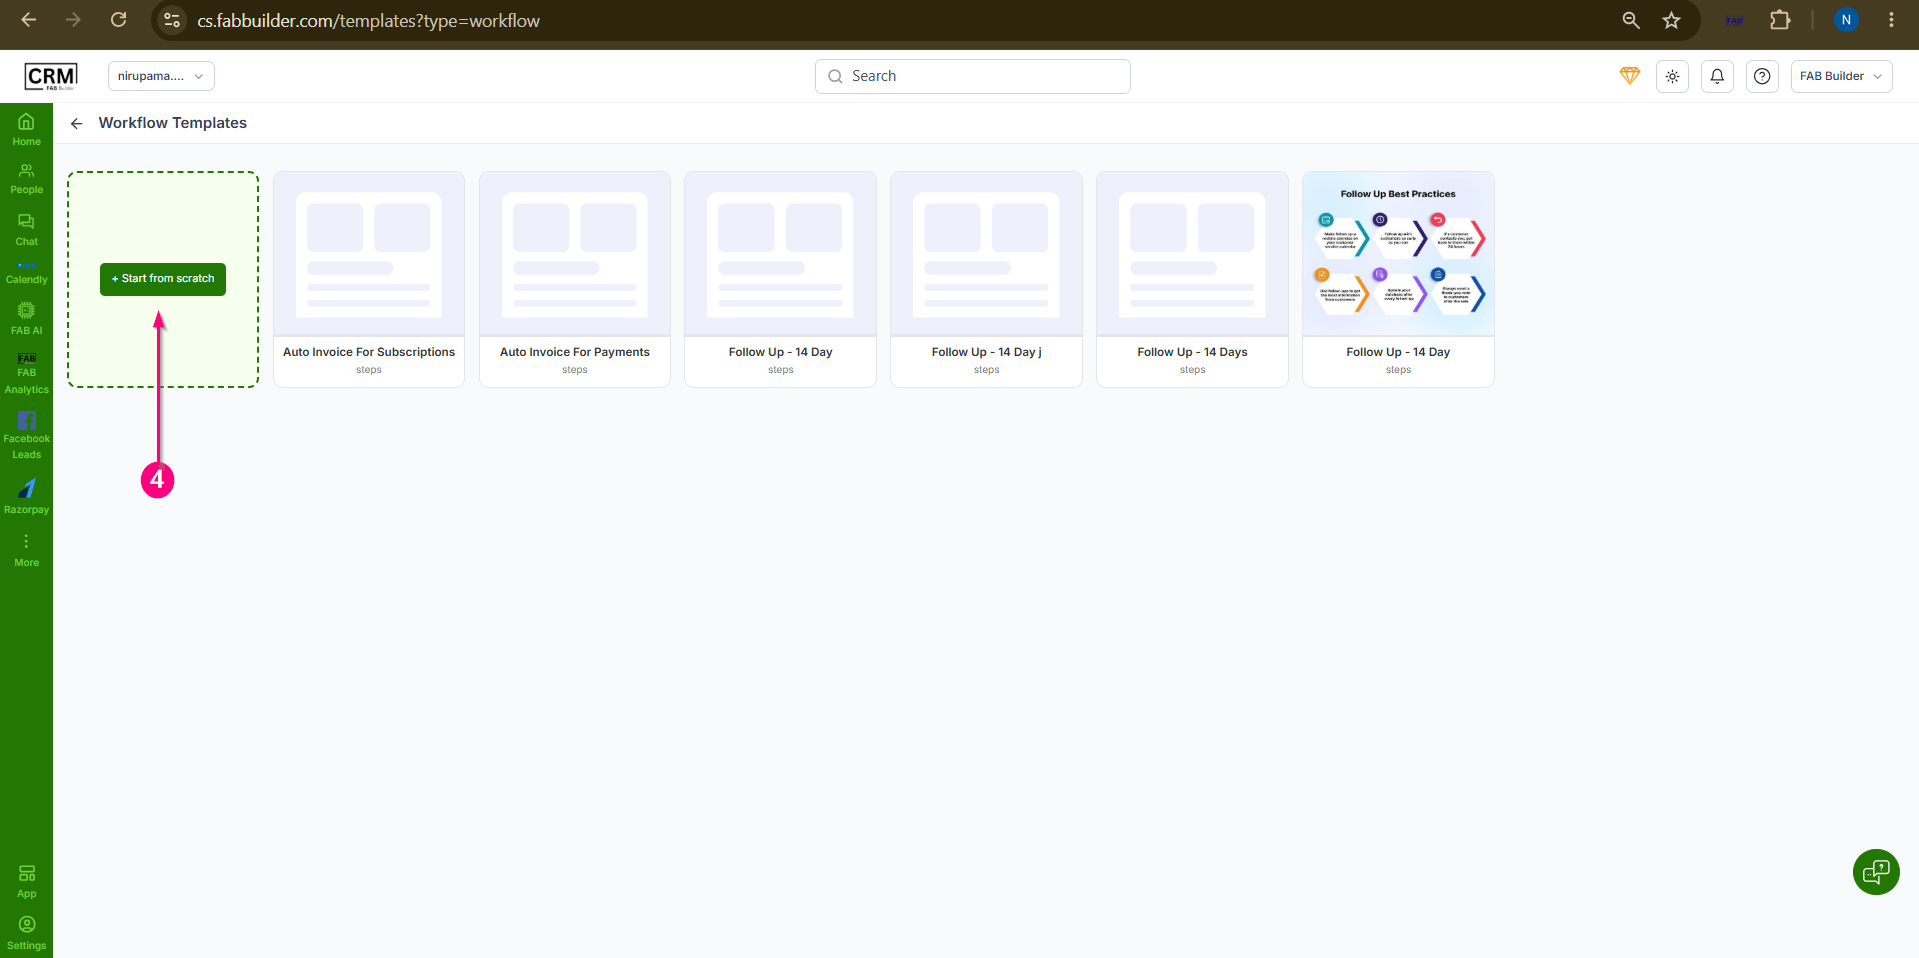 Screen-Method to Create Workflow
5.Enter the workflow name in theWorkflow Name field. 6.Save the workflow details if required.
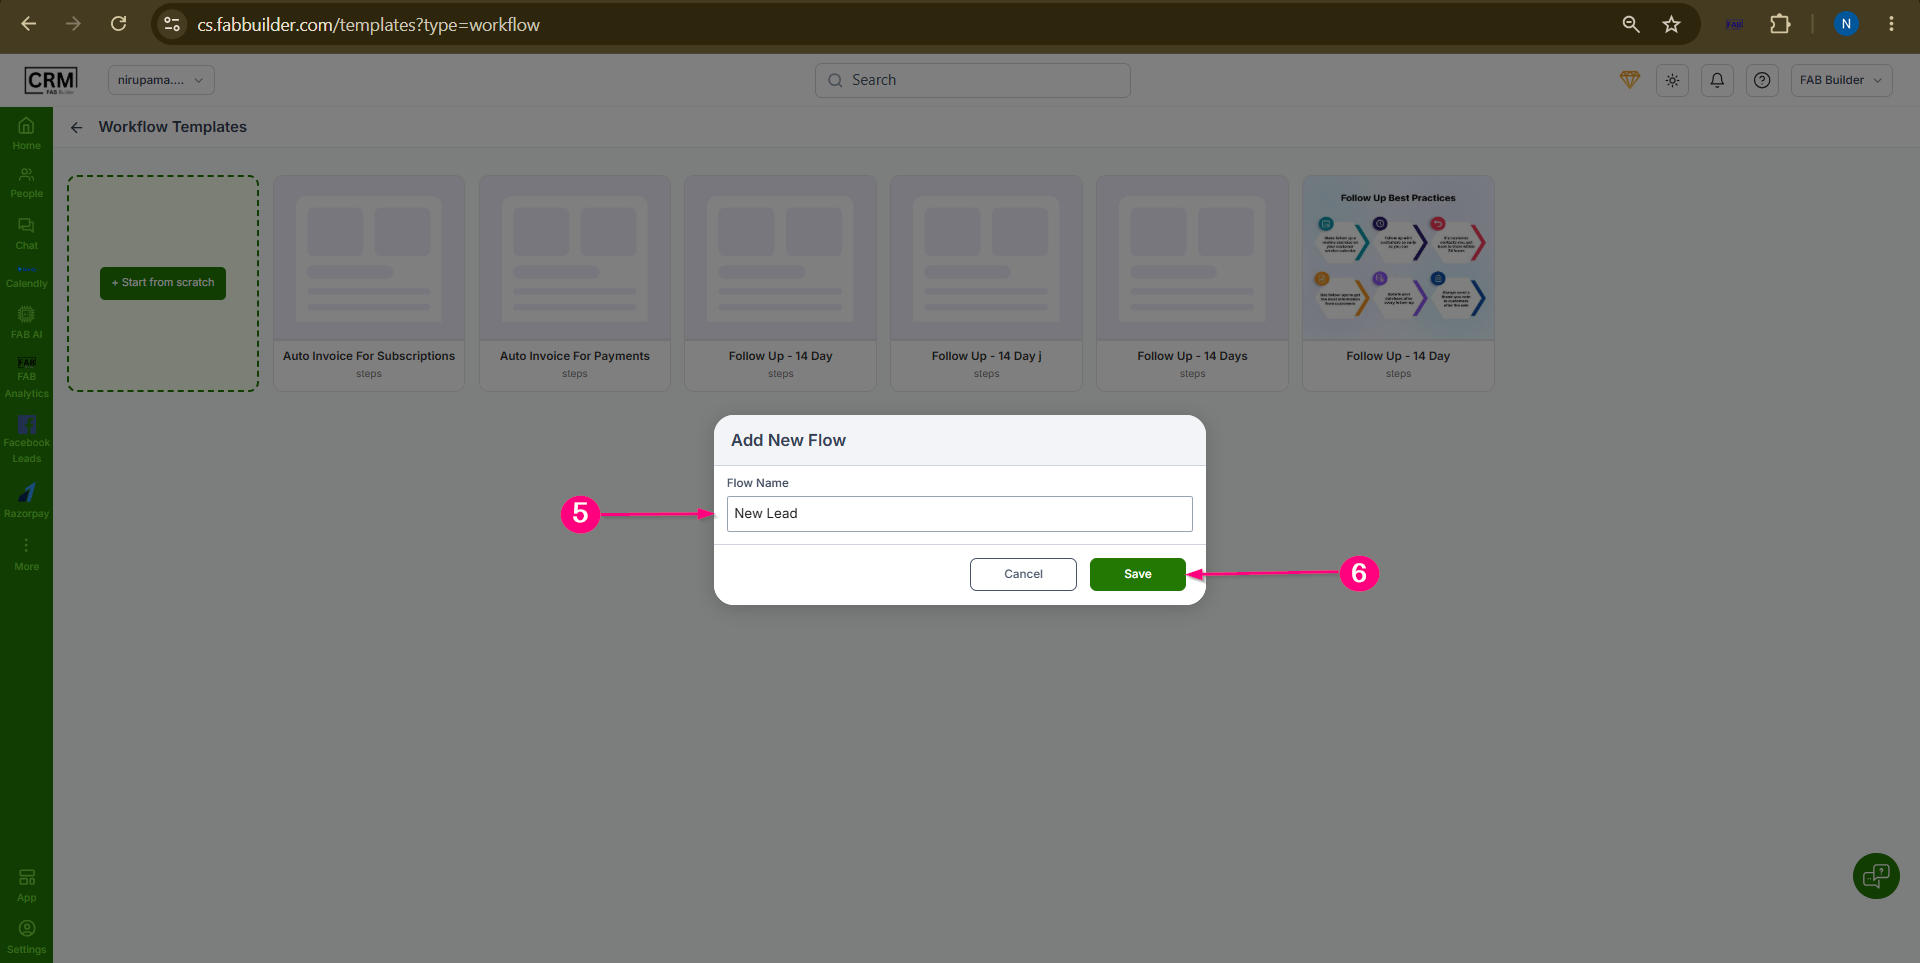 Screen- Add Workflow Name
Step :Add a Trigger7. Click on Triggers category8. Select any Trigger card element to define when the workflow should start. Now selected the trigger card can be viewed on workflow canvas. 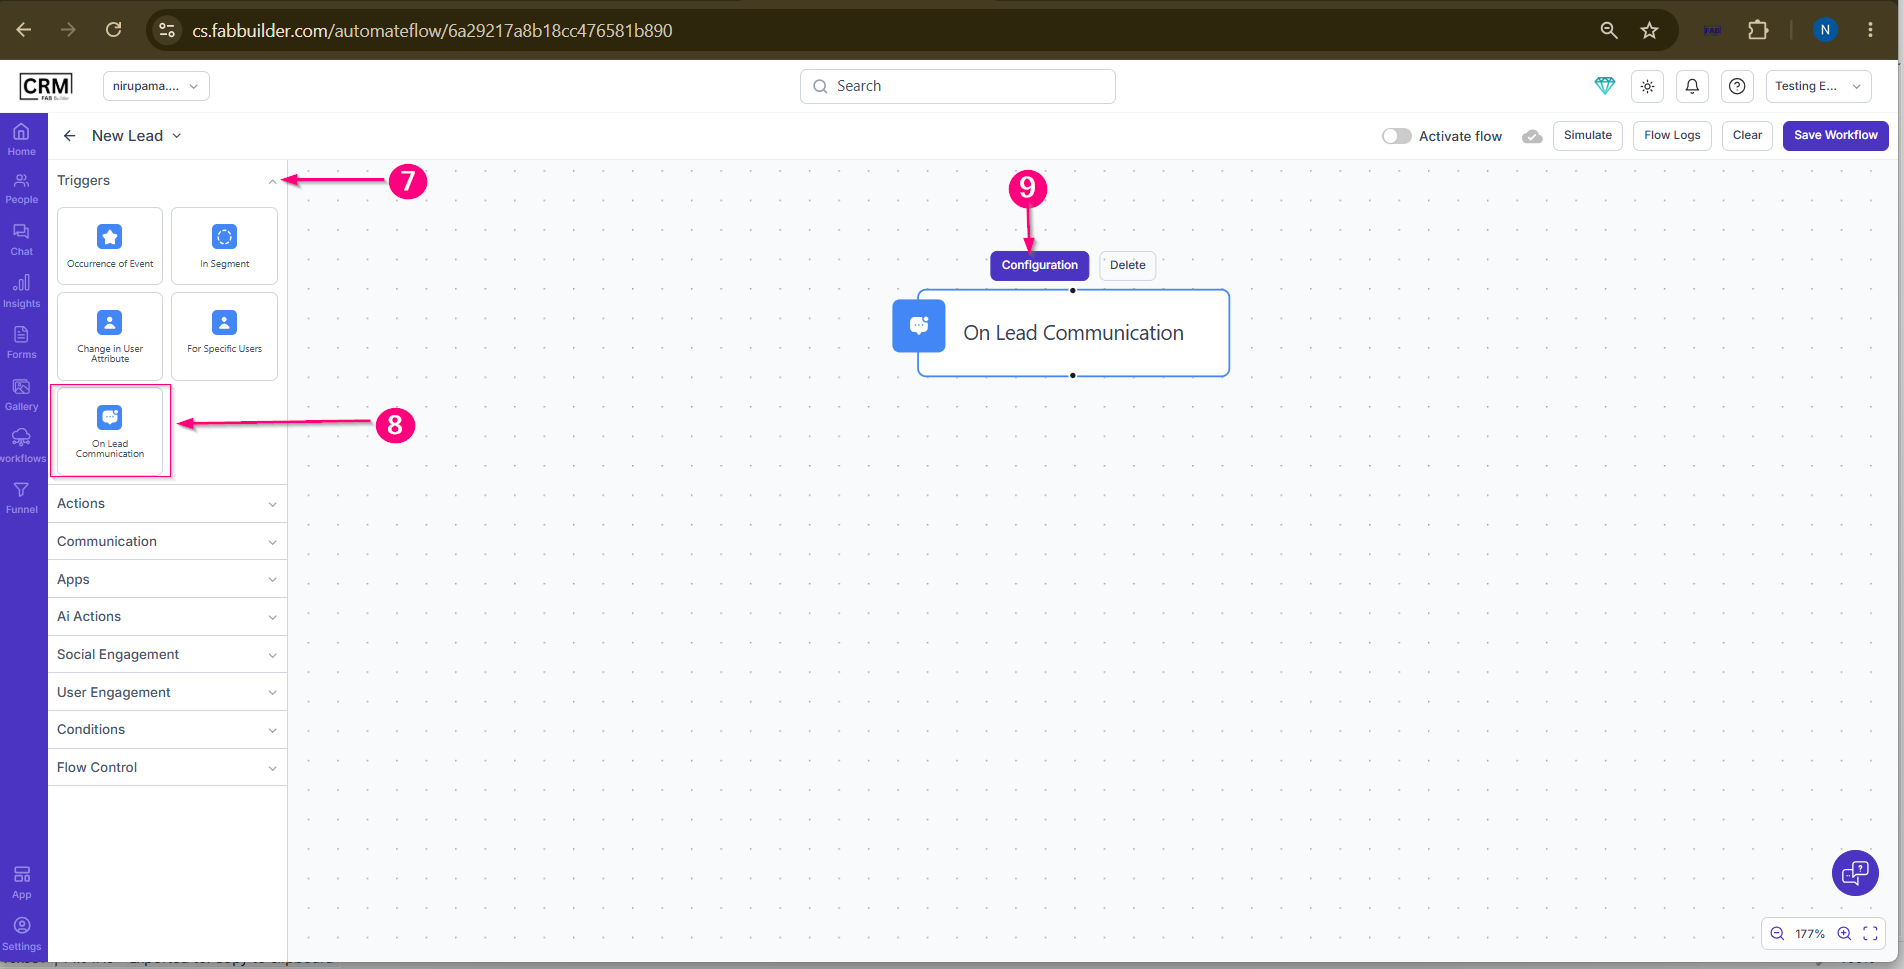 9. Click on Configure to add details 10.Add configuration details 11. click to save configuration details. 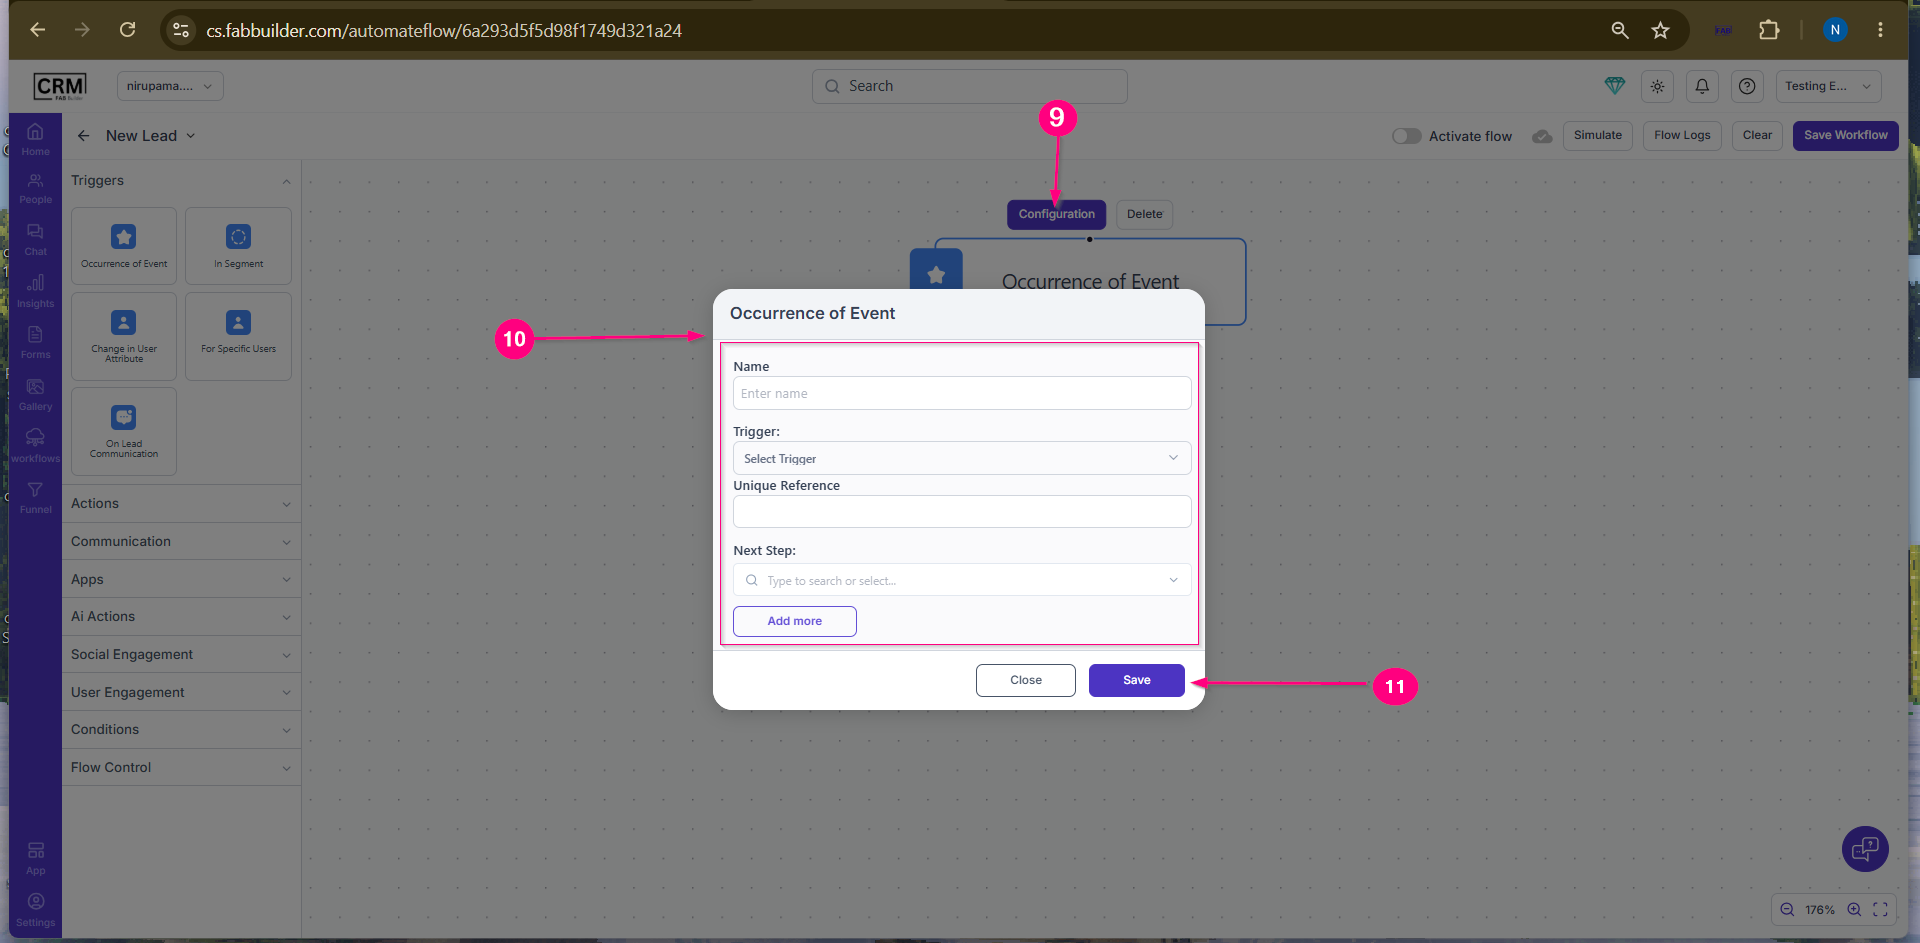 Screen- Add configuration Details
12.Add the required Conditions, Actions, Communication, or Flow Control elements and configuration details based on the desired business process as in previous step.Here Create Task Action is selected. 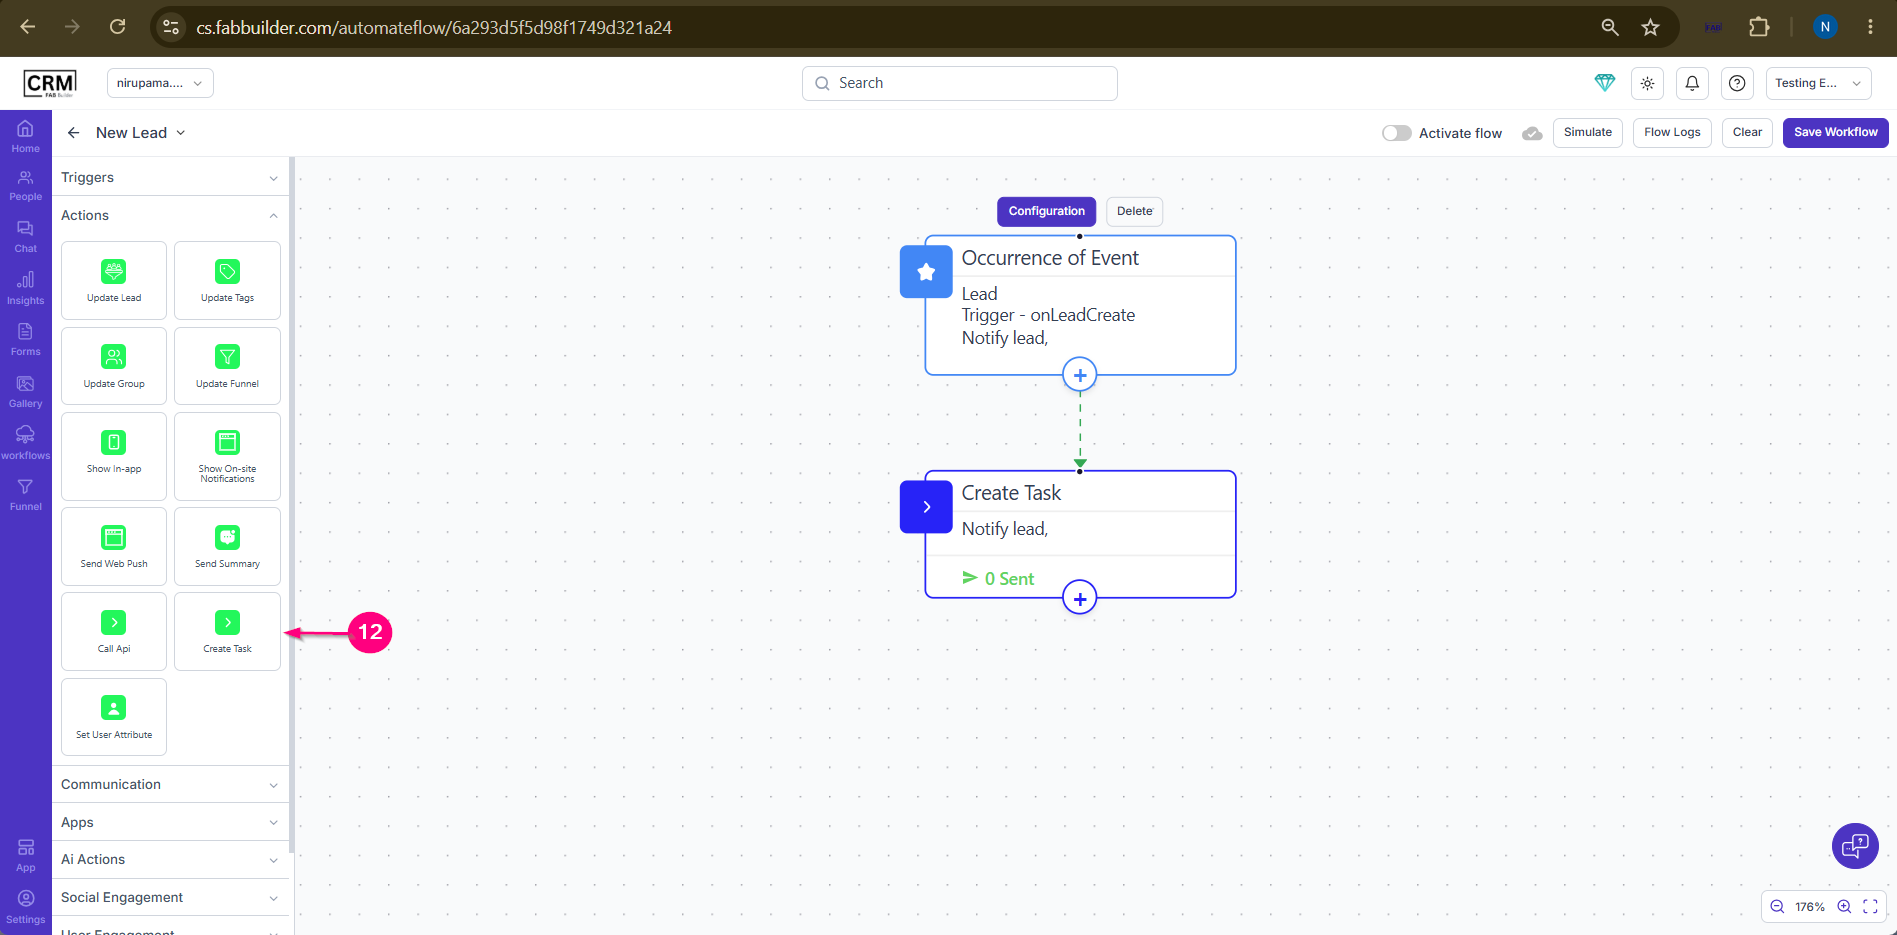 Screen- Add Action 13- Click on confifuration button of action element. 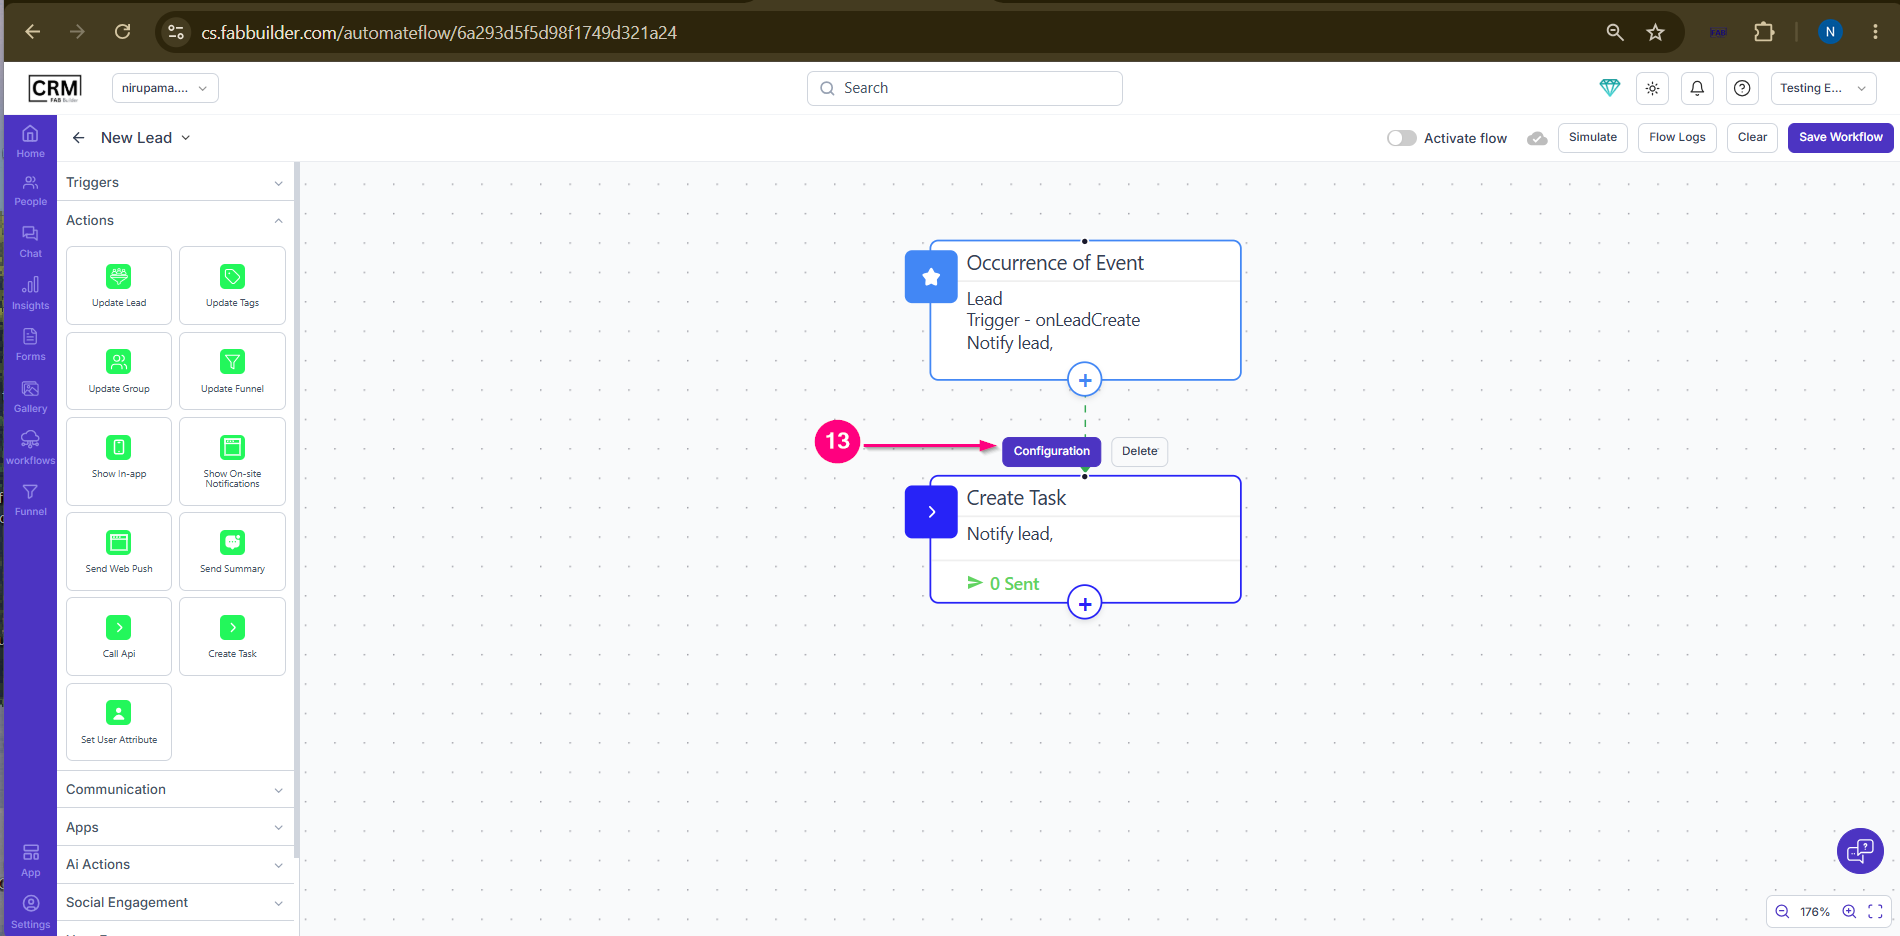 Screen- Configuration the Workflow Element 14. Add more workflow element cards listed as per required bussiness workflow by repeating same step mentioned above. After adding more such element user can view final workflow. 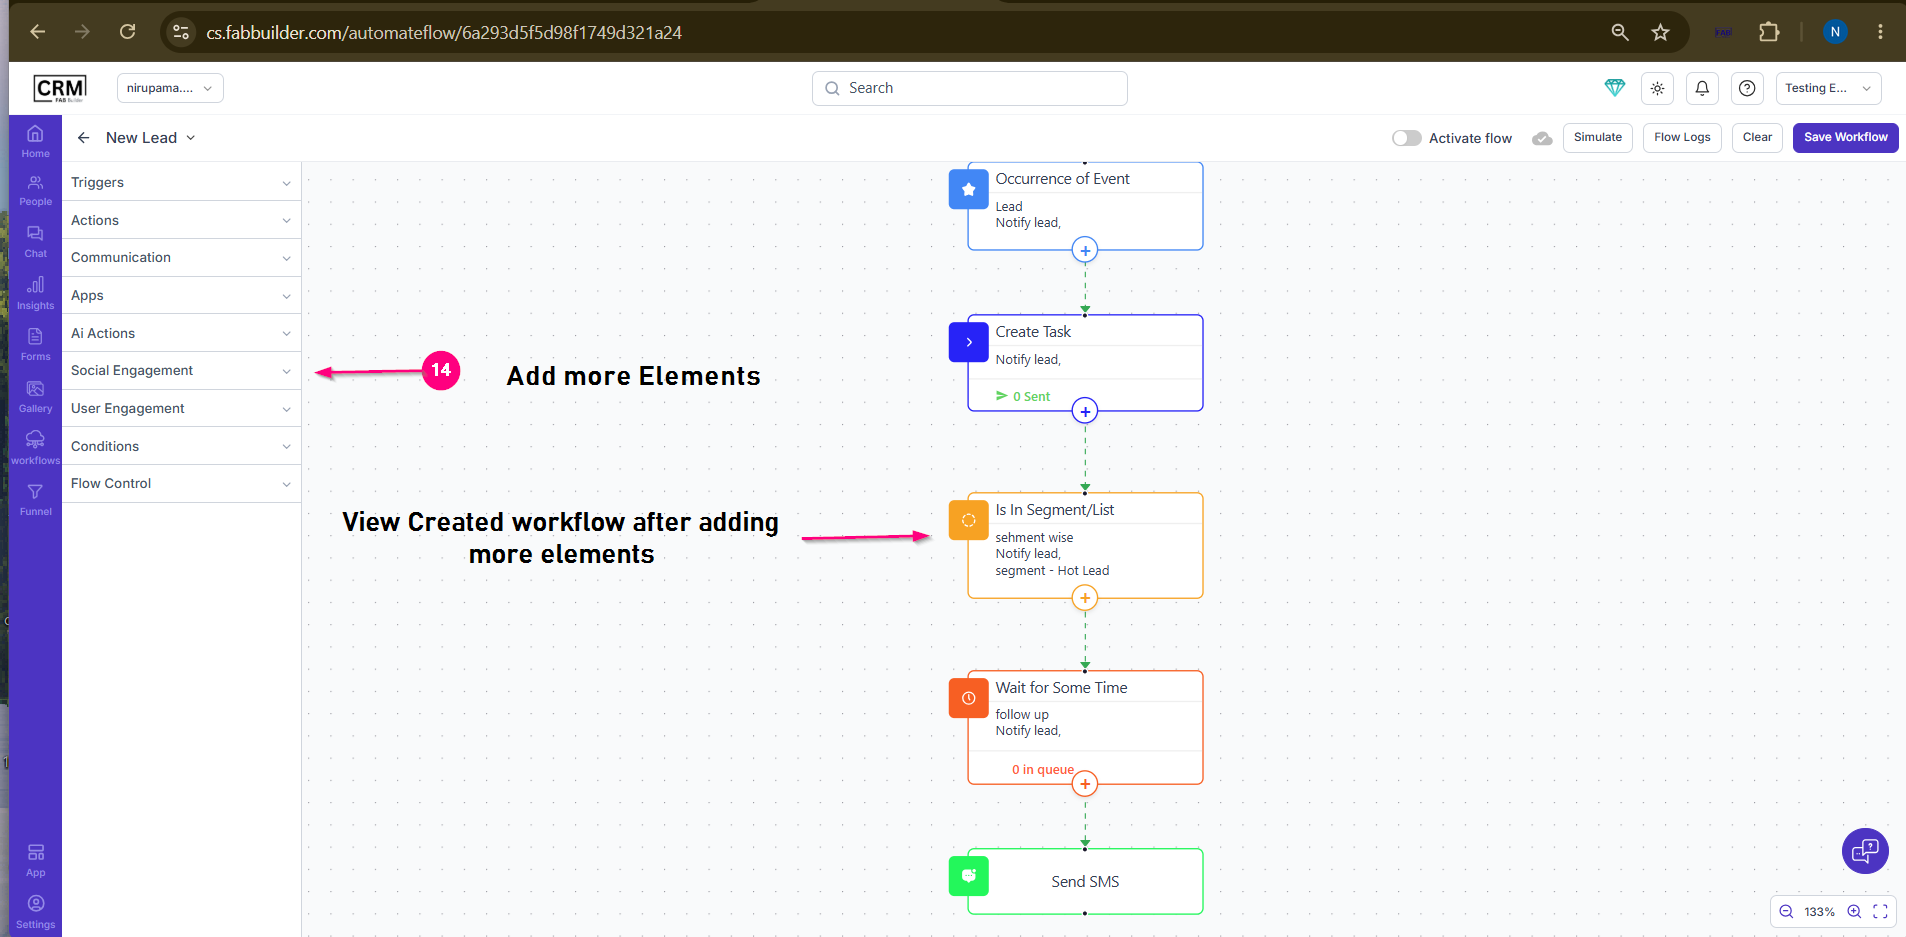 Screen- View Created workflow After Adding Element Step:Test the Workflow15.Click Simulate and Verify that the workflow behaves as expected. Step Save and Activate16.Click Save Workflow.
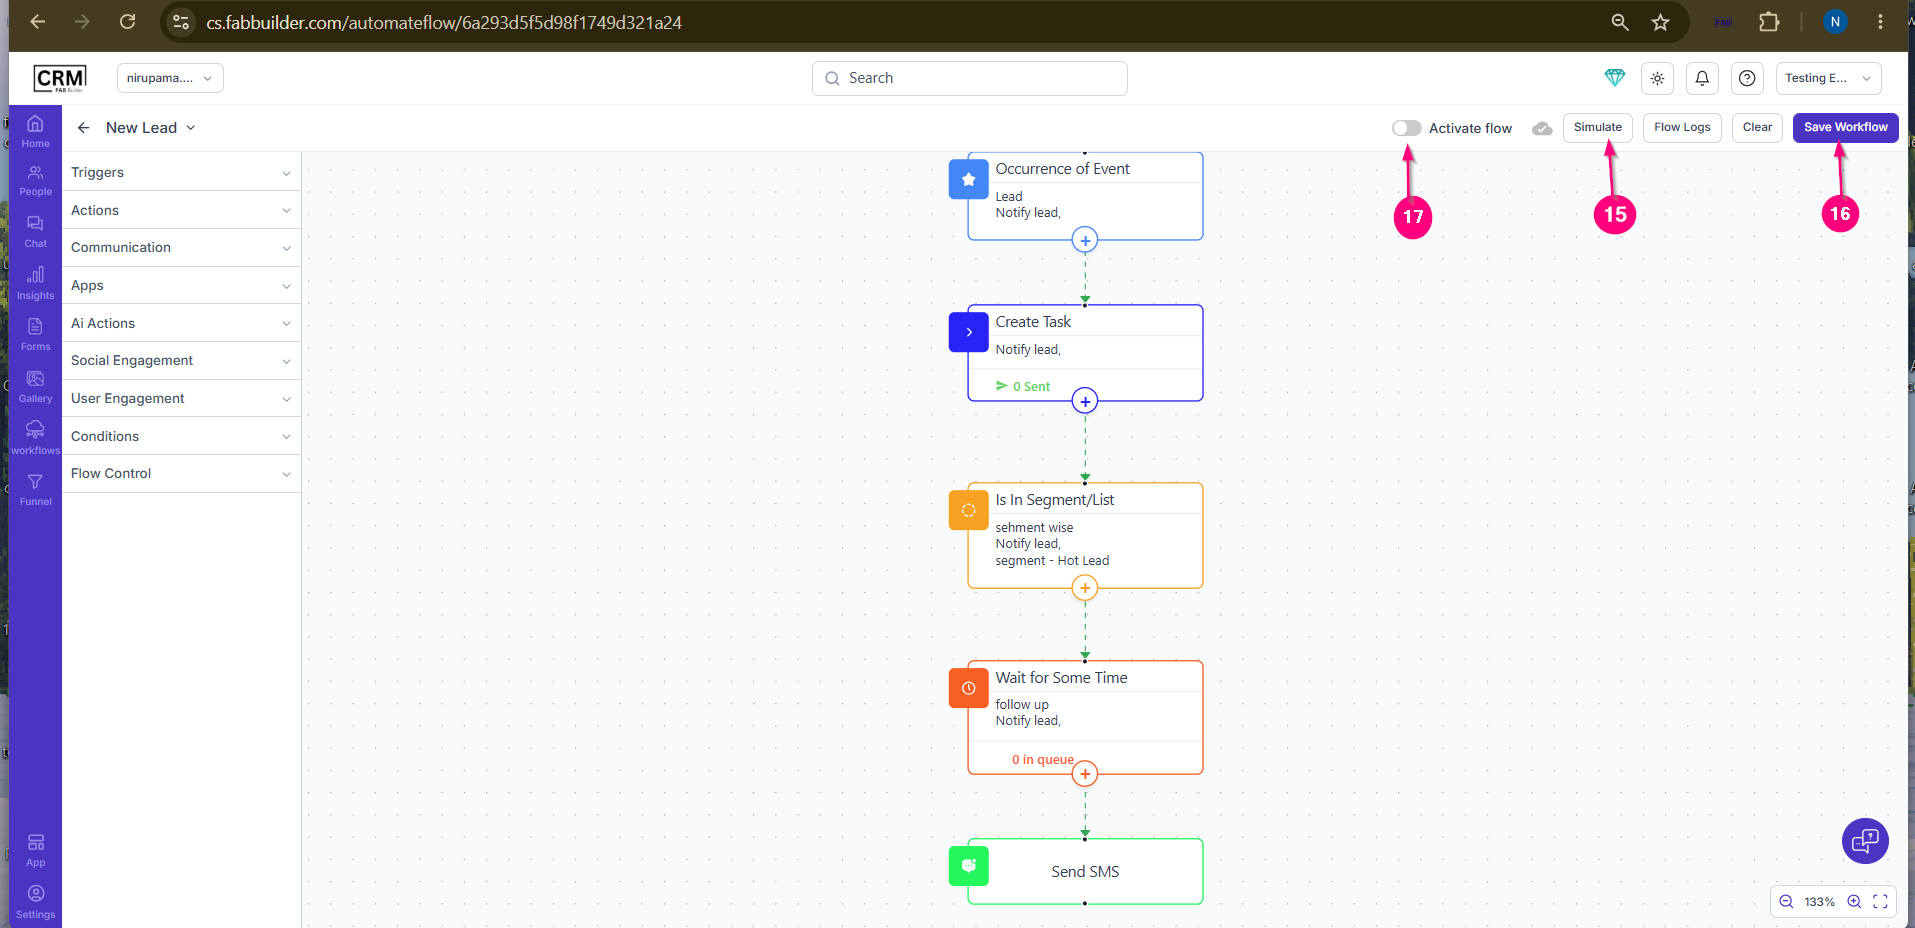 Screen- Created Workflow
Do's
Don'ts
|