How to Create a FormThis documentation explains the step-by-step process to create a form in CRM. PrerequisitesBefore creating a form, ensure that:
Step1 : Access the Form ModuleAfter successful login to the CRM platform, navigate to the Form module from the navigation menu. 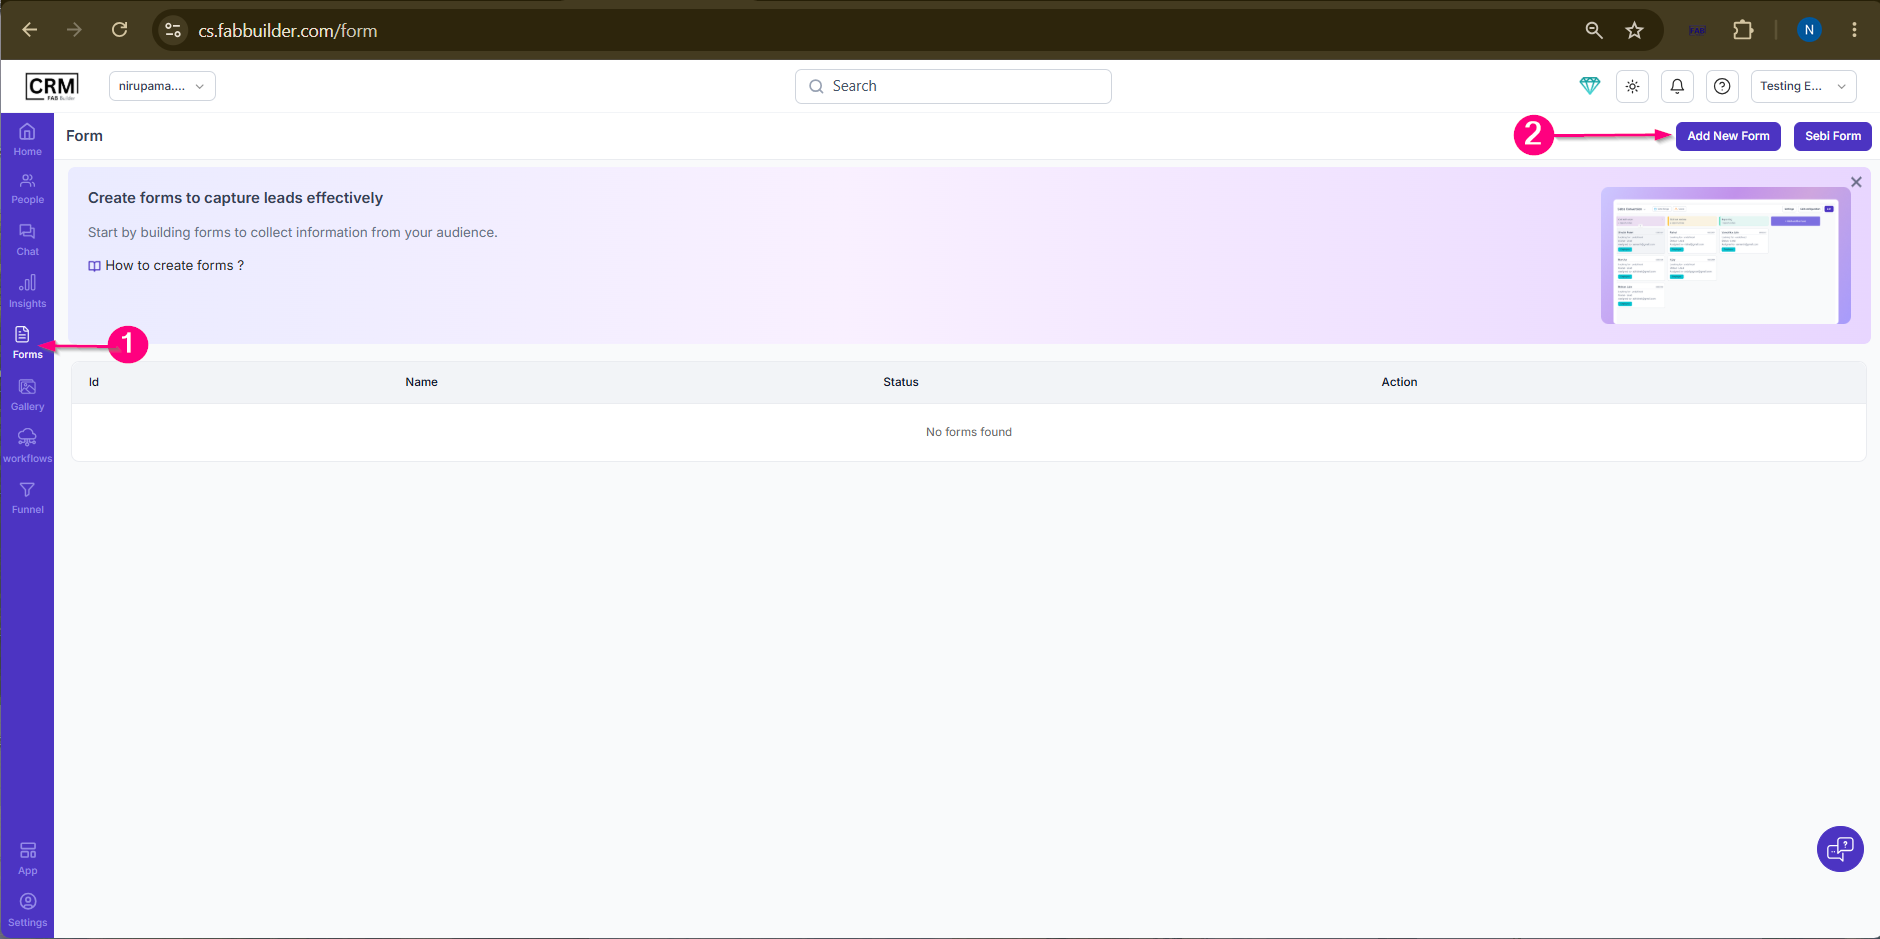 Enter your text here
Step2 : Click on Add New FormClick on theAdd New Formbutton. A popup window will appear where the user can enter the form details.
Step 3: Enter Form NameEnter the required form name. Example:
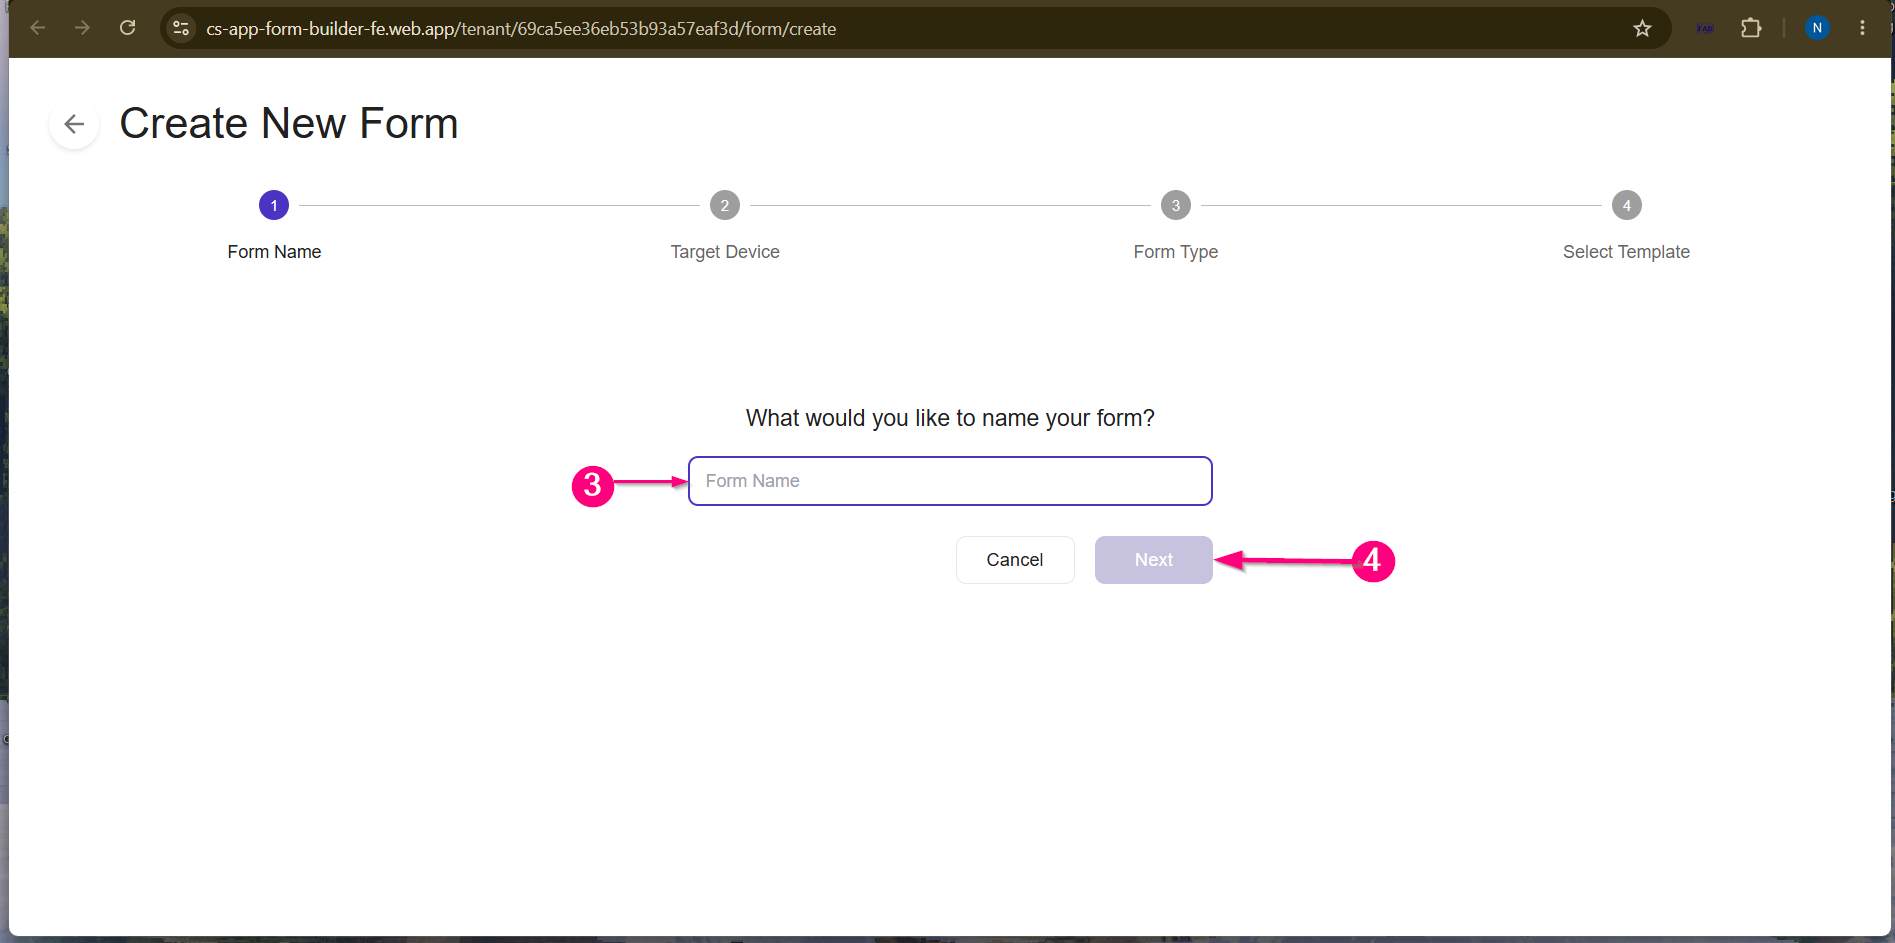
Step 4: Click Next to continue
Step 5:Select DeviceSelect the device type on which the form will be displayed. Available options may include:
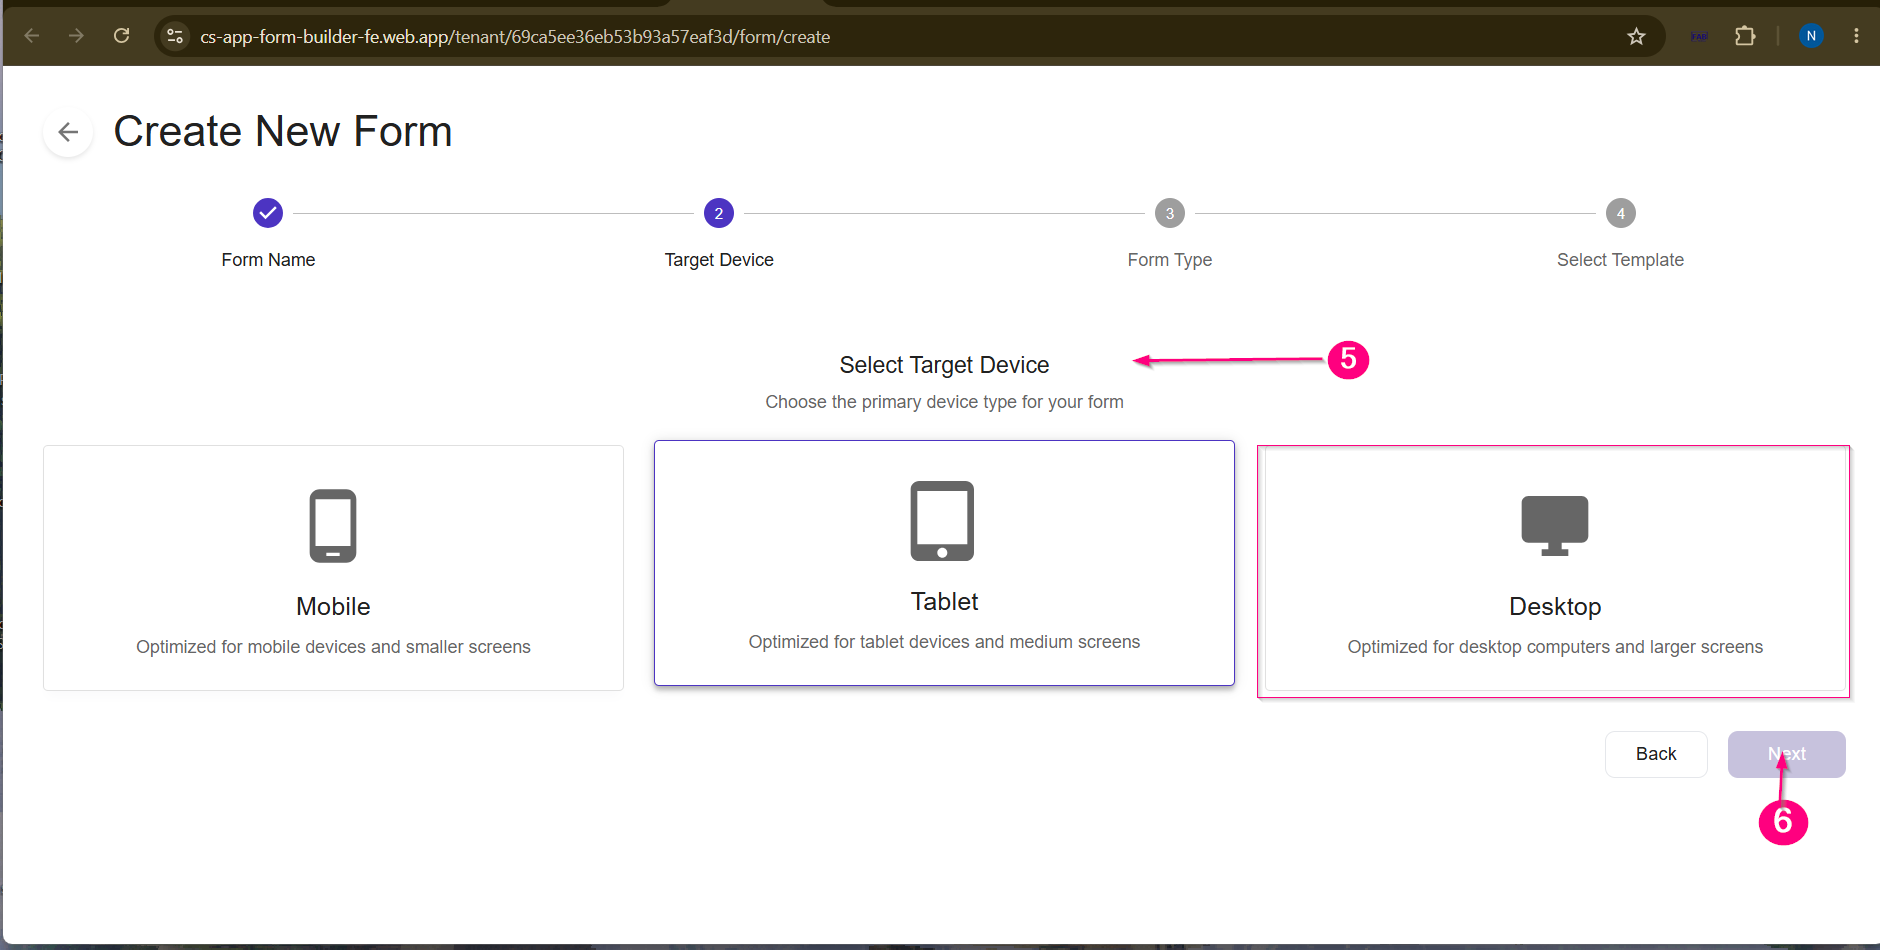 Screen- Select Device
Step 6: Click Next
Step 7: Select Form TypeChoose the form structure:
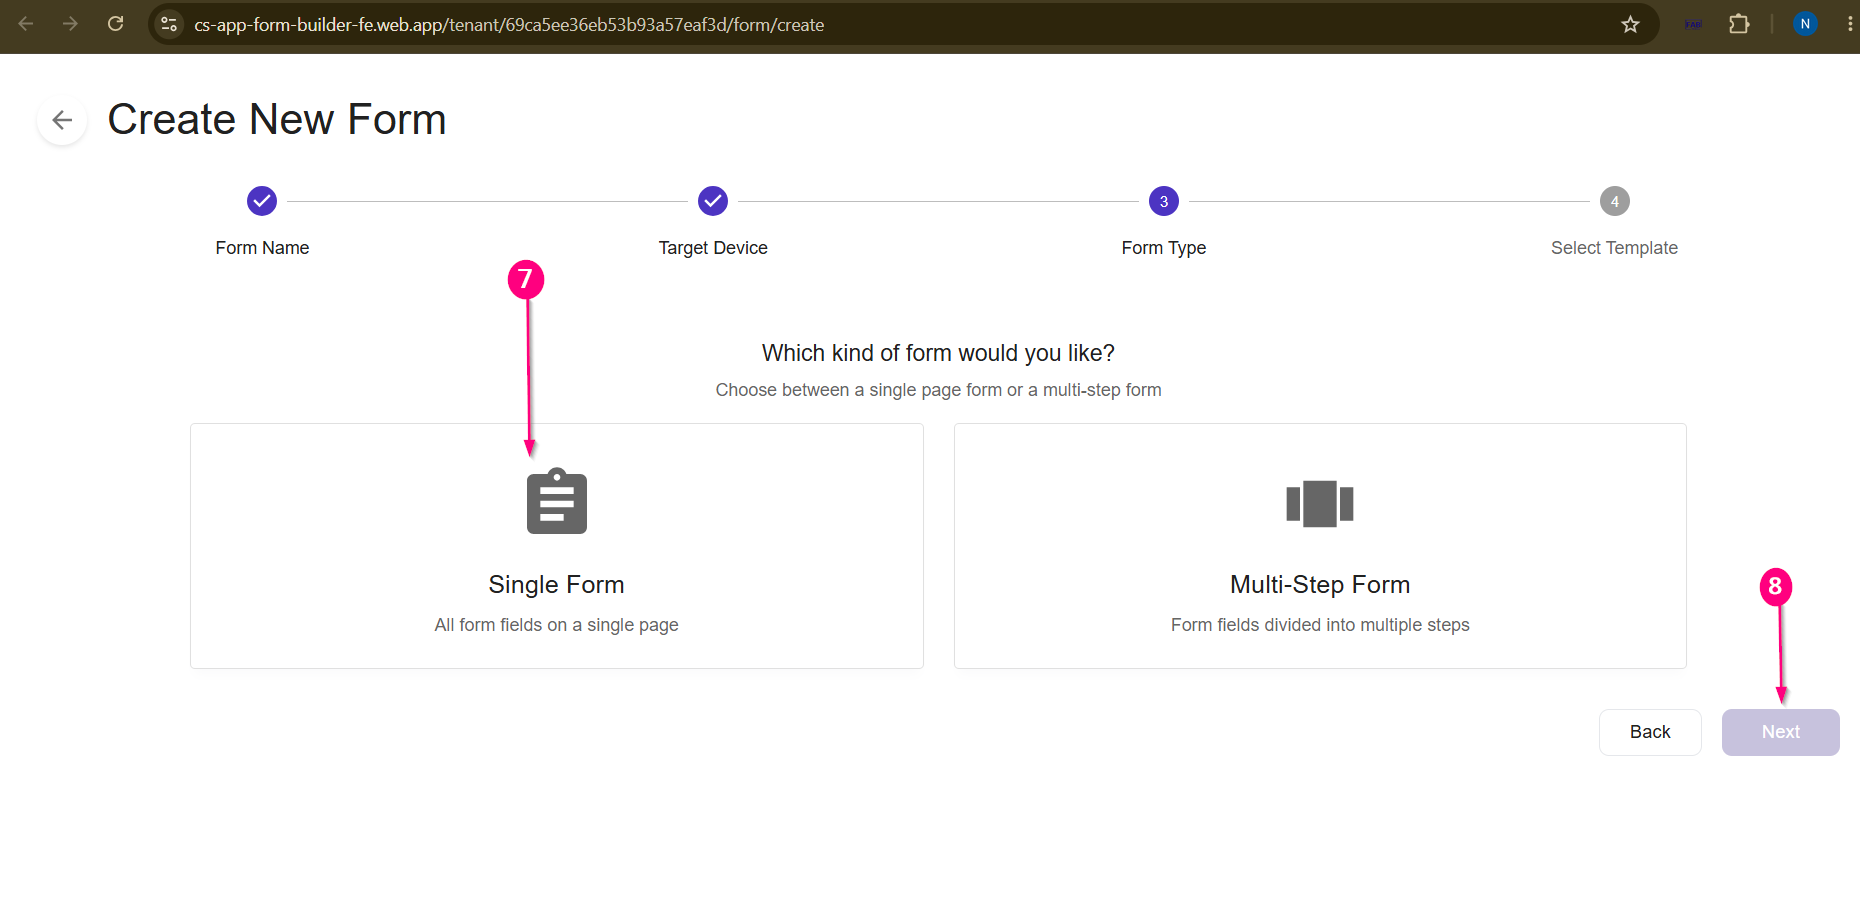 Screen- Form Type Selection
Step 8: Click Next to button
Step 9: Select Form Creation MethodChoose how you want to create the form:
For this example, the form is created using the Start from Scratch option.
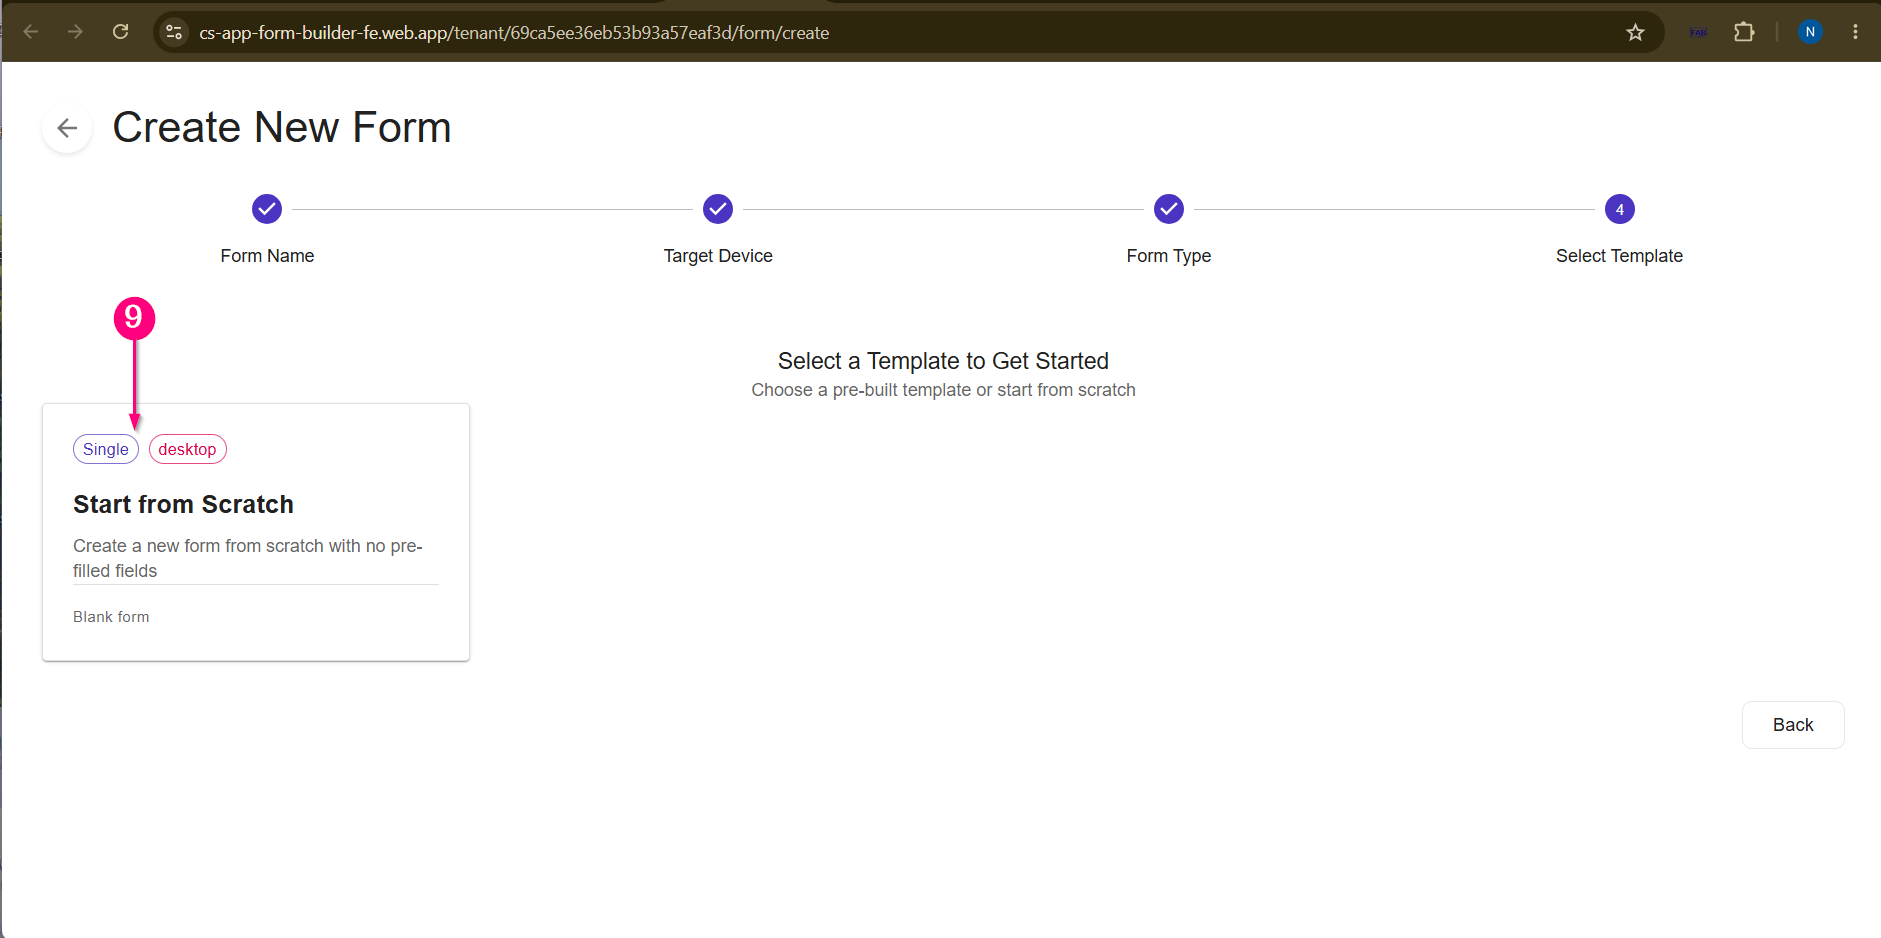 Screen- Start from Scratch
Step 10: Add Form ElementsFrom the Toolbox panel, drag and drop the required form elements onto the form canvas. Available elements may include:
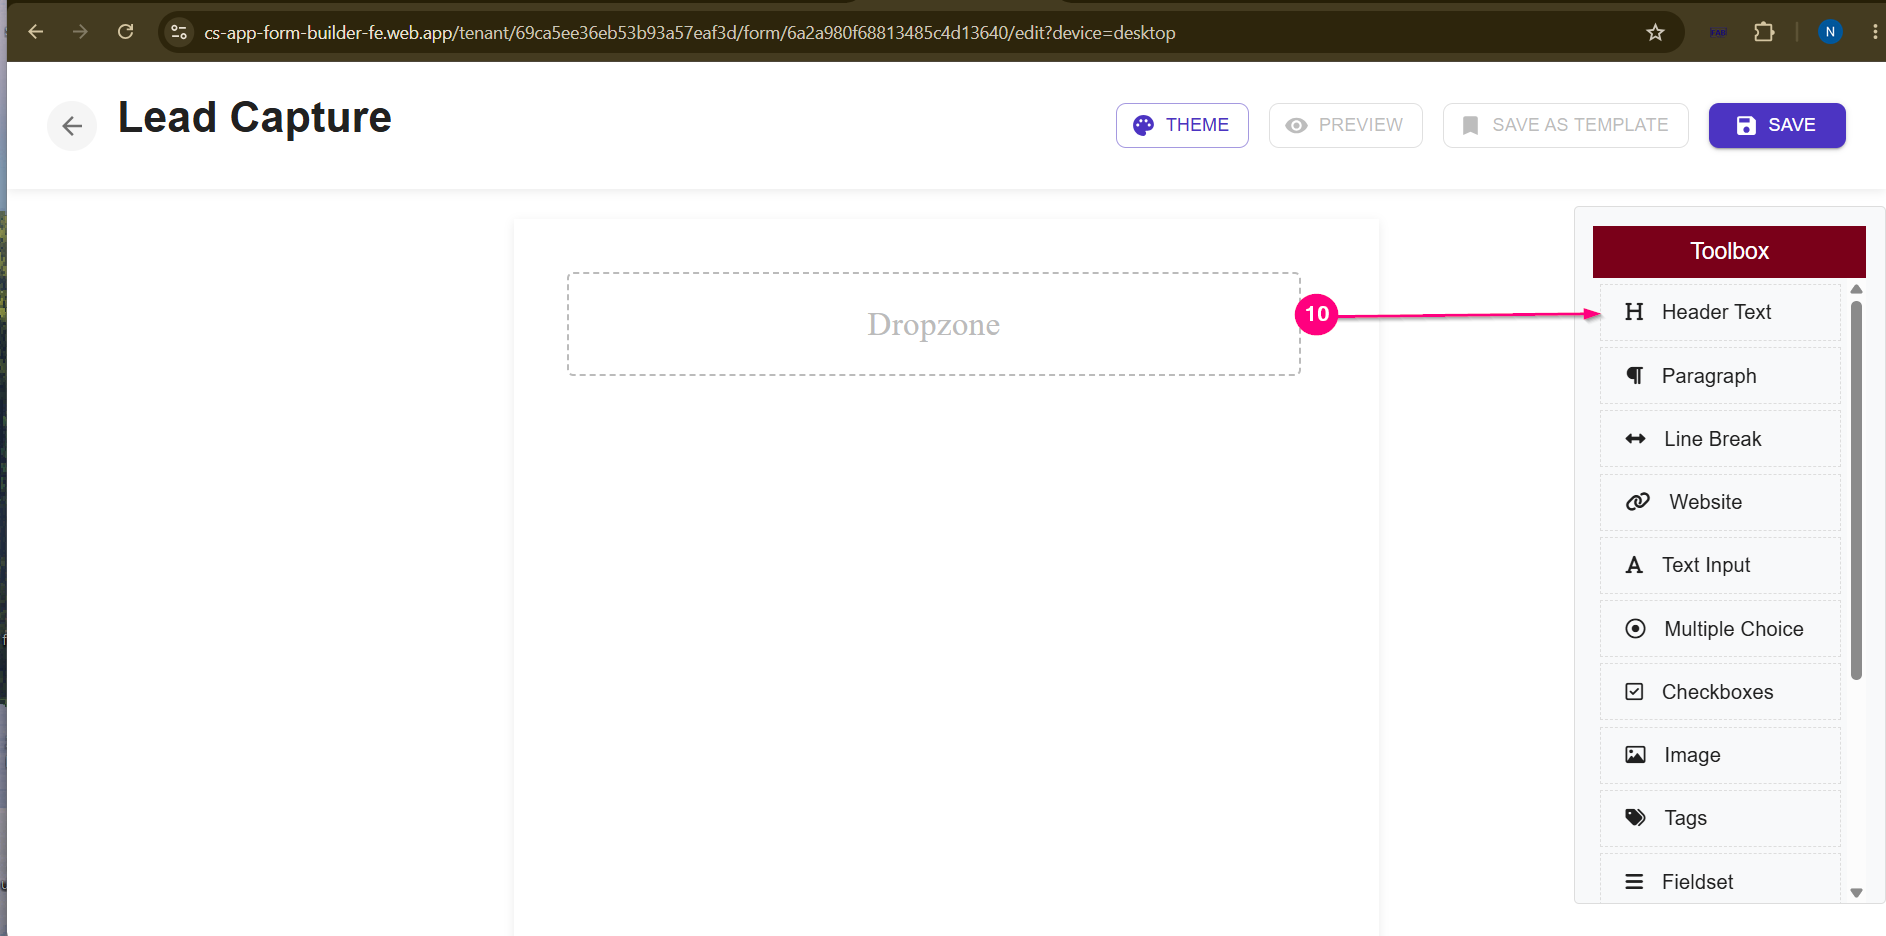 Screen – Add Form Elements
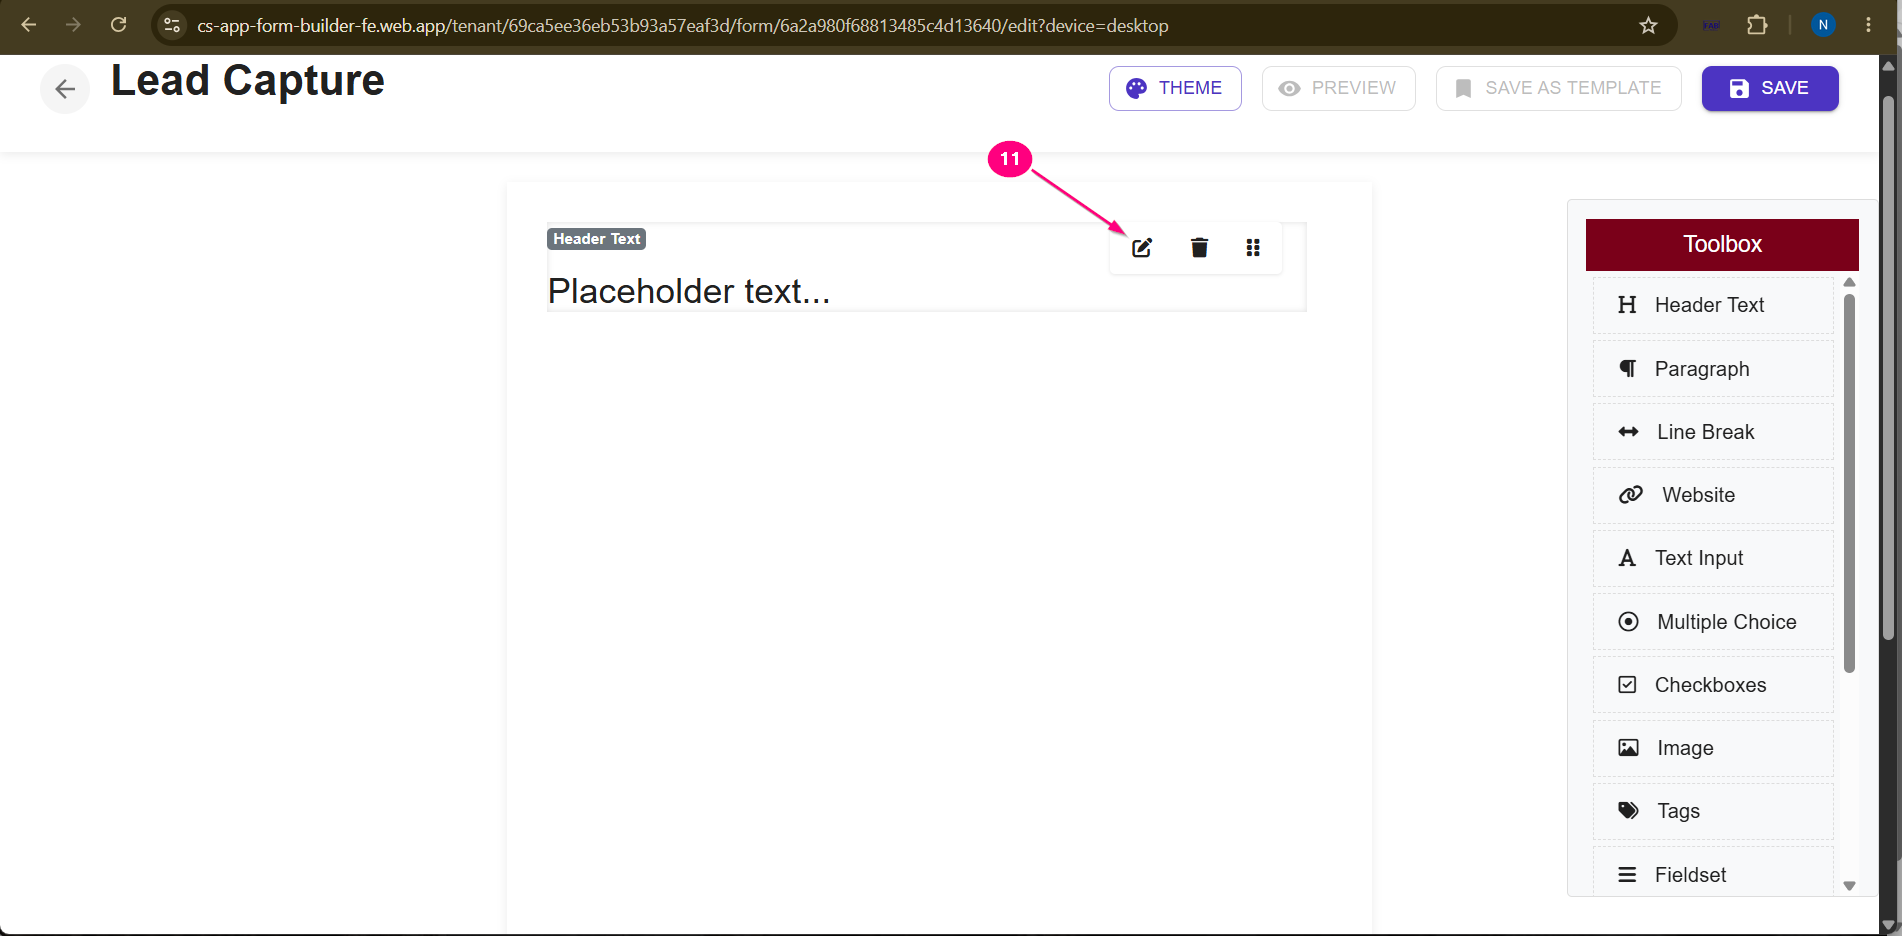
Step 11: Edit Form ElementSelect the required form element and click the Edit button. The field configuration panel will open.
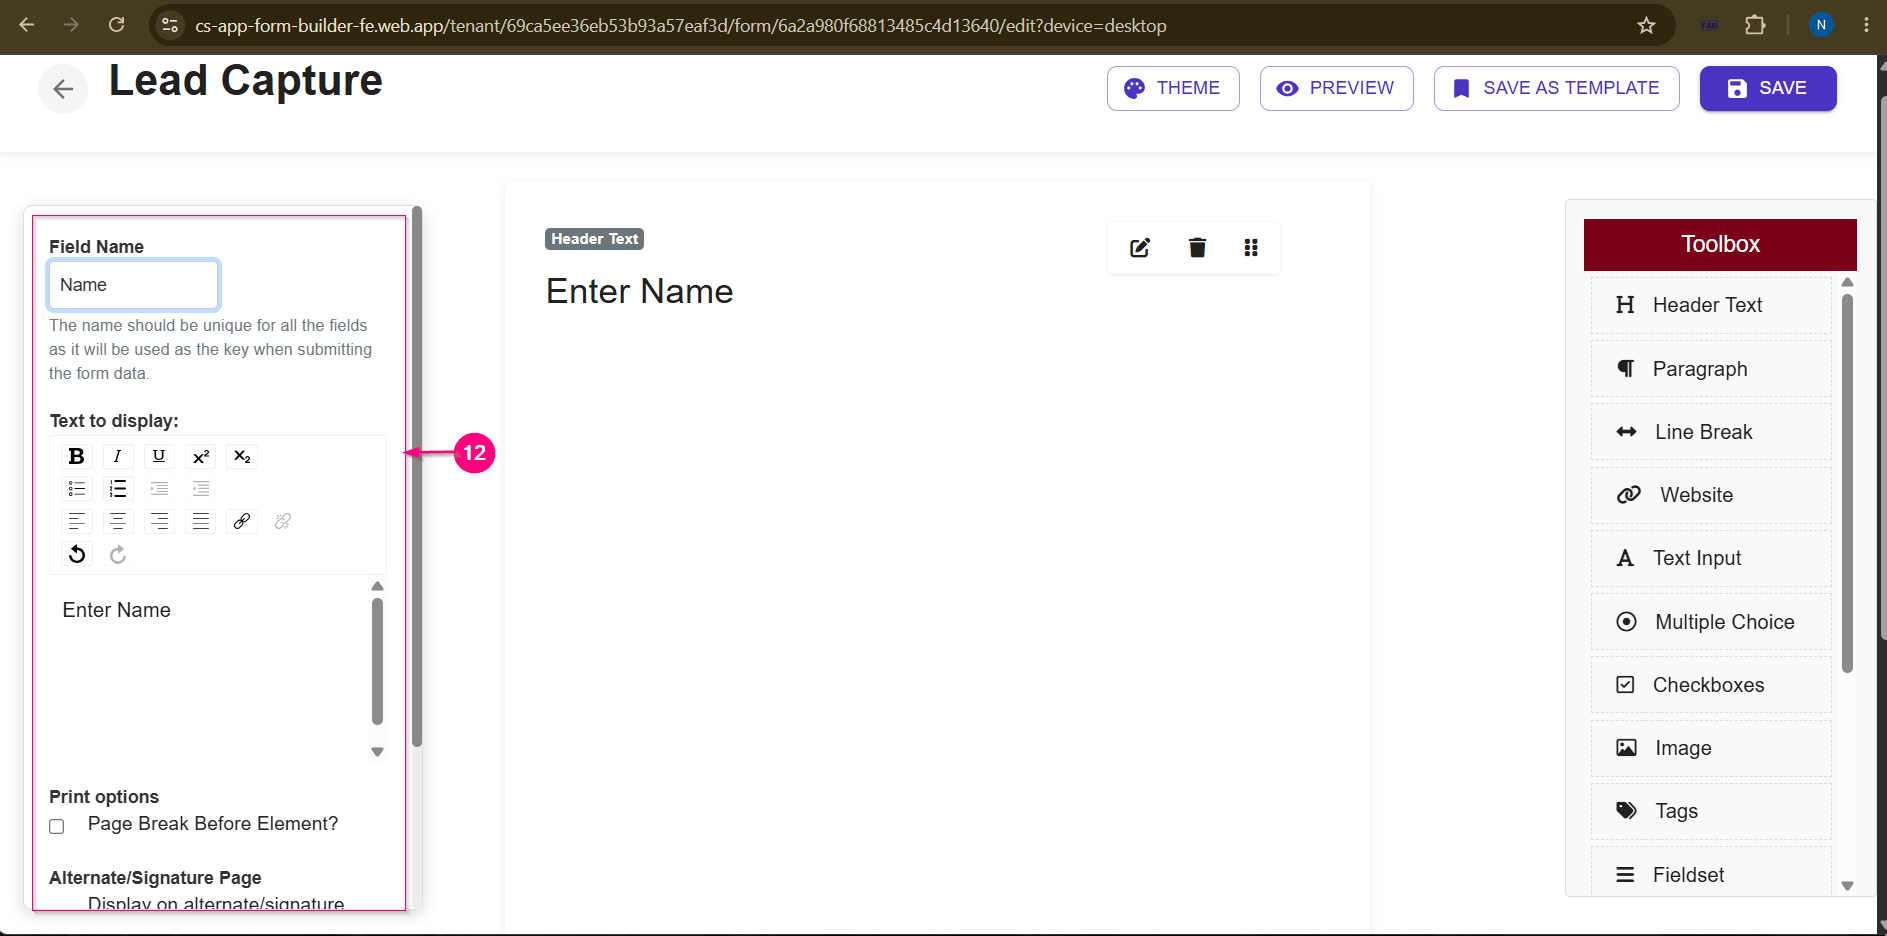
Step 12: Configure Field DetailsConfigure the selected field from the settings panel. Example:
The field name should be unique because it is used as the key when form data is submitted.
Step 13: Add More Form ElementRepeat the same process to add and configure additional fields as required. Example:
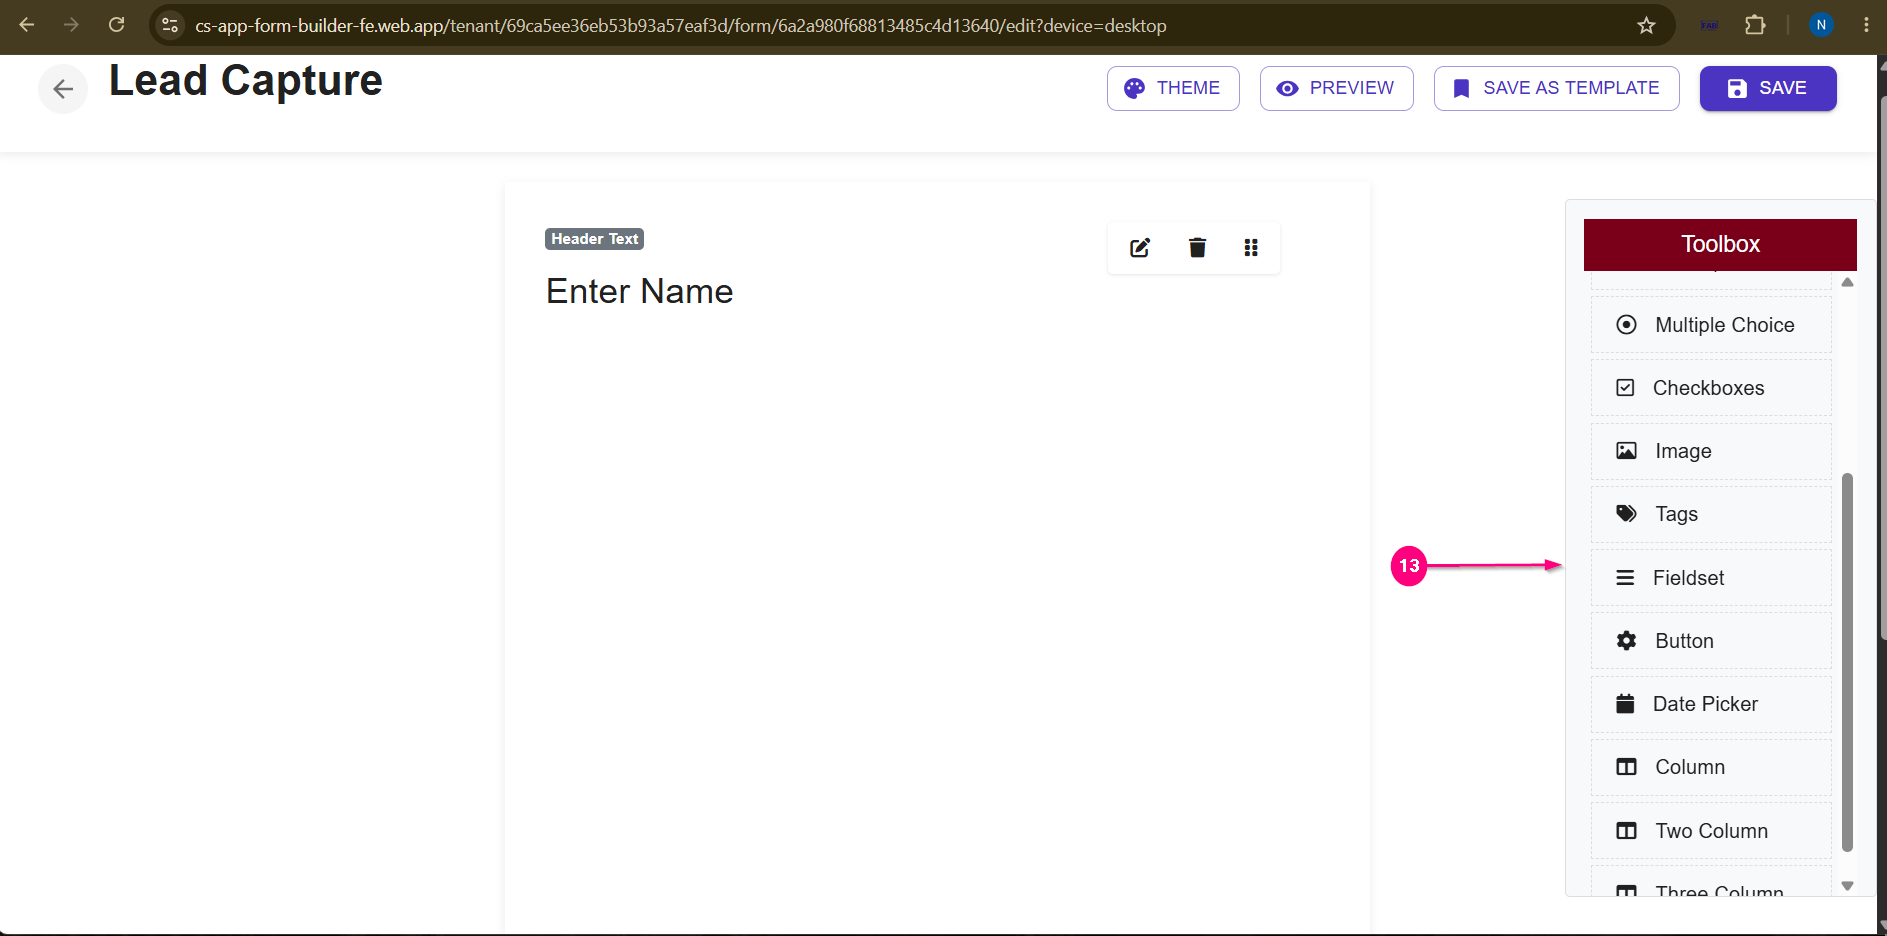 Screen – Add More Fields 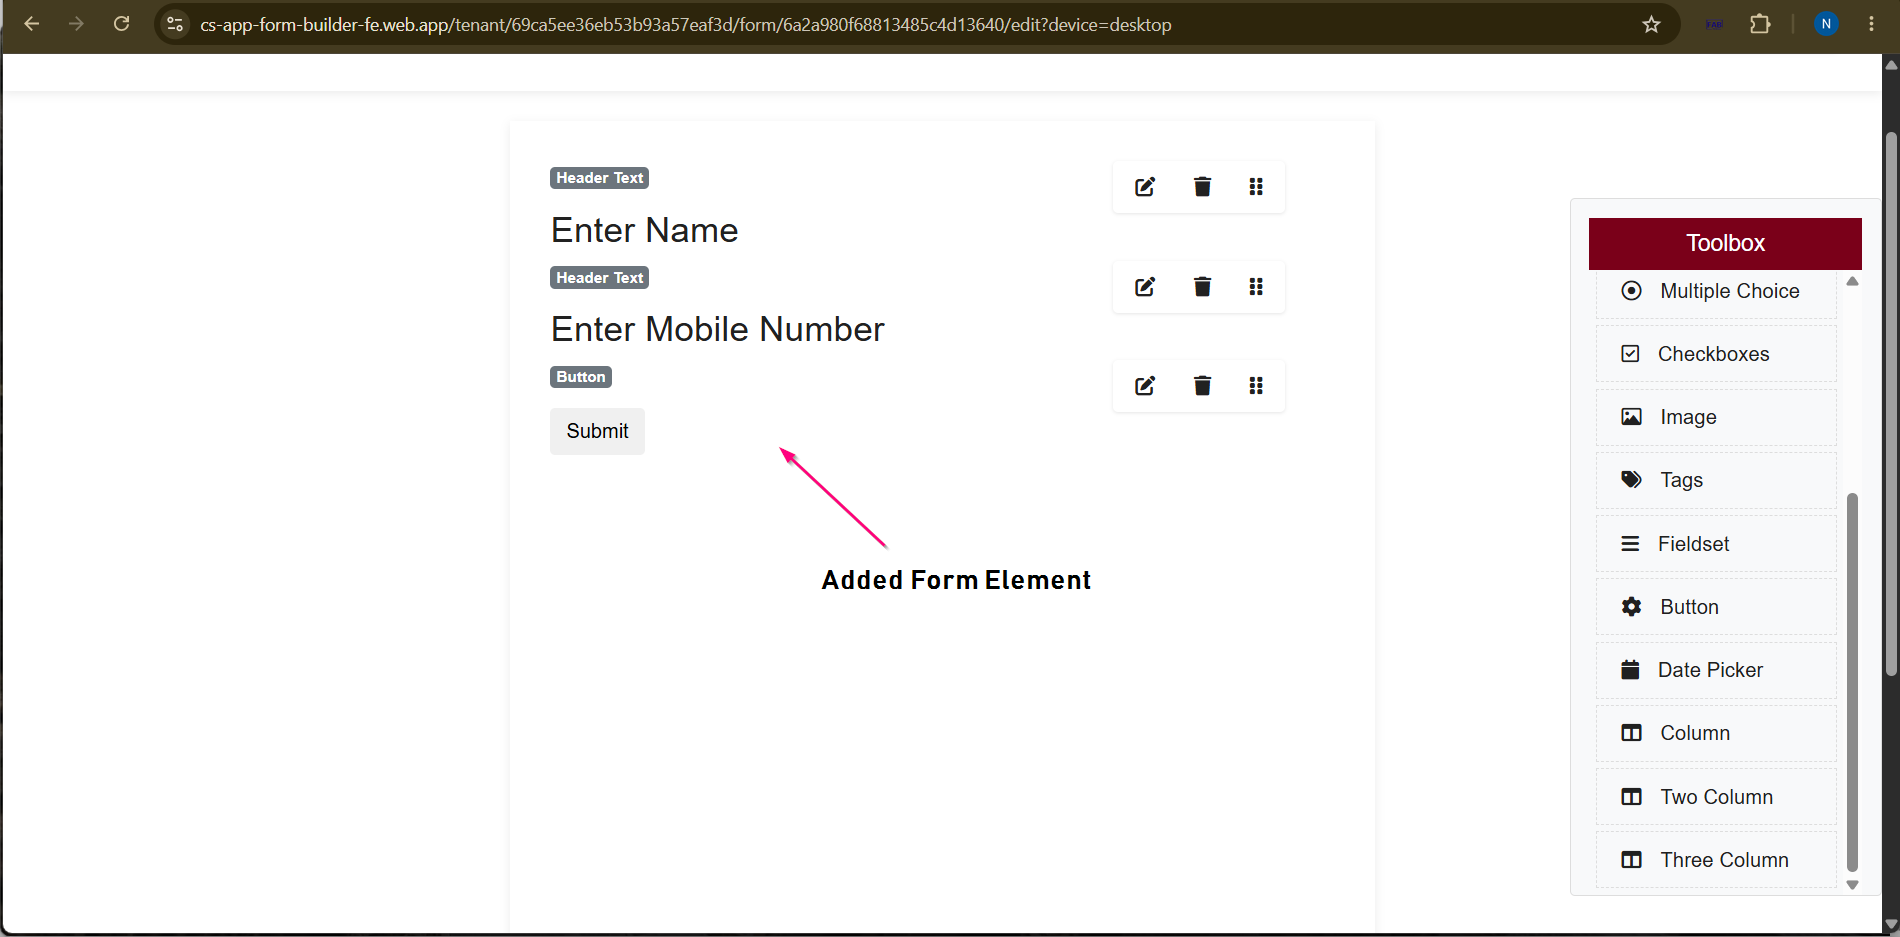
Step 14: Preview FormClick thePreviewbutton to verify the form layout, field placement, and functionality. Screen – Preview Form
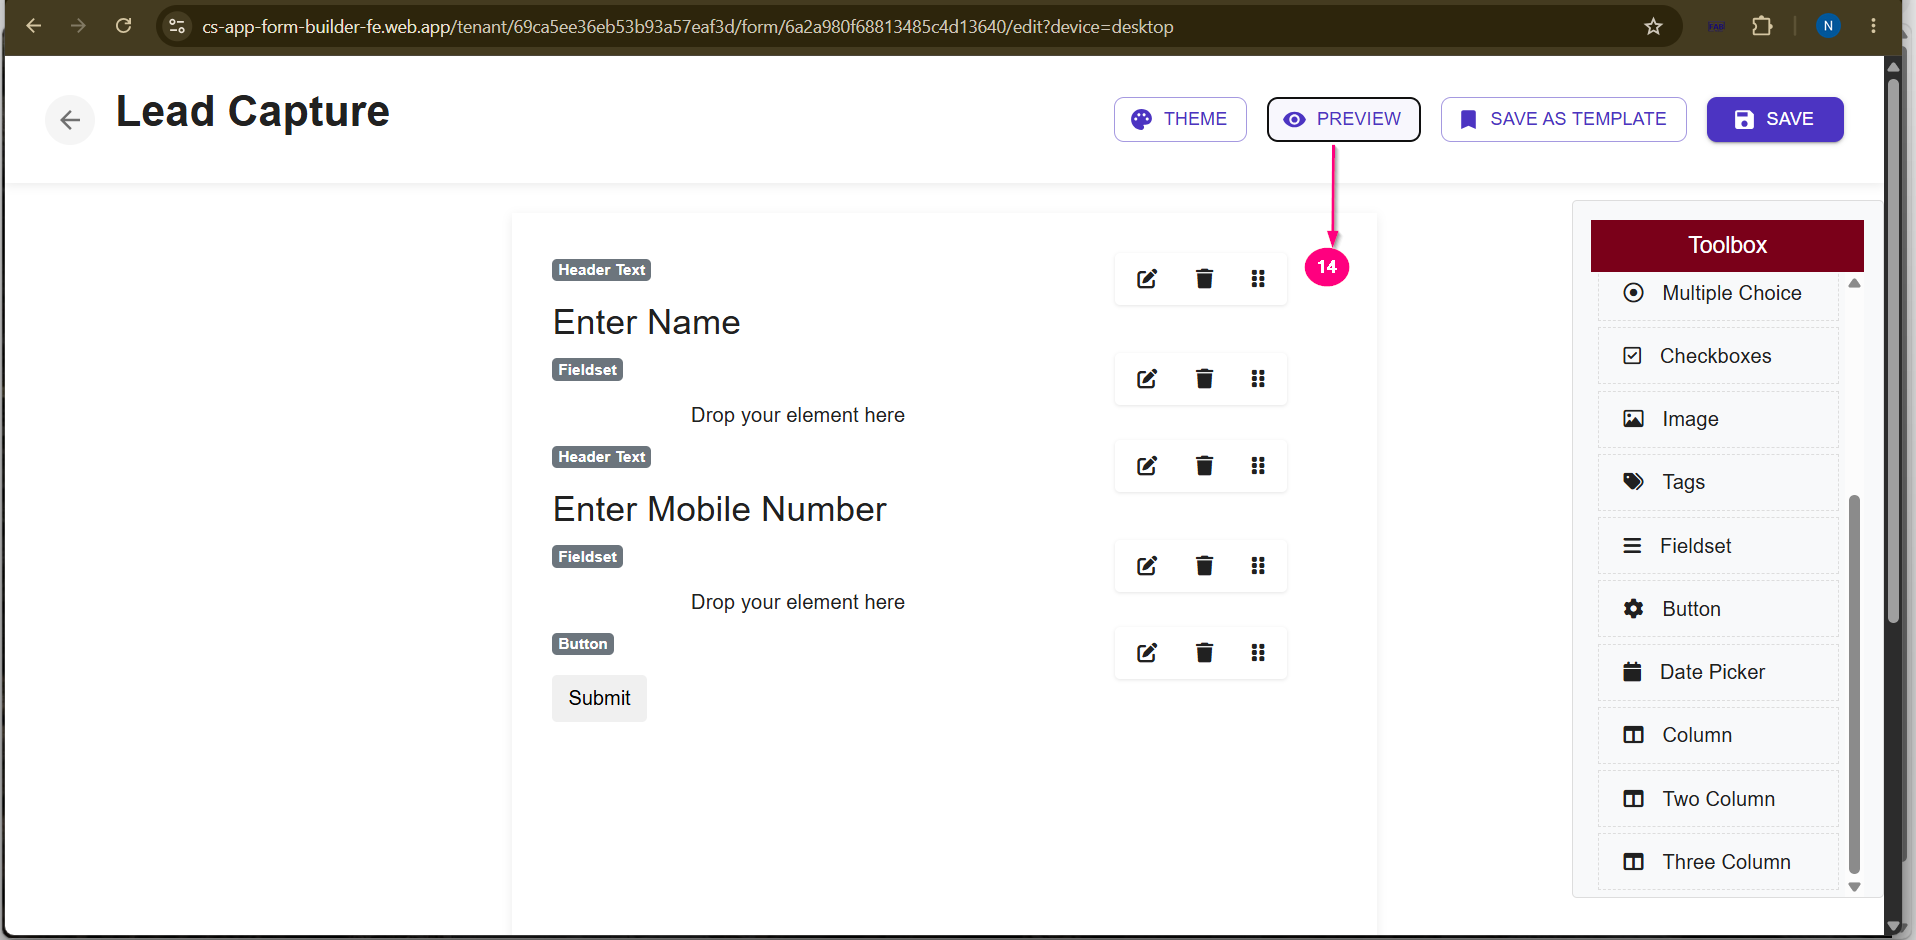 Screen- Preview Button 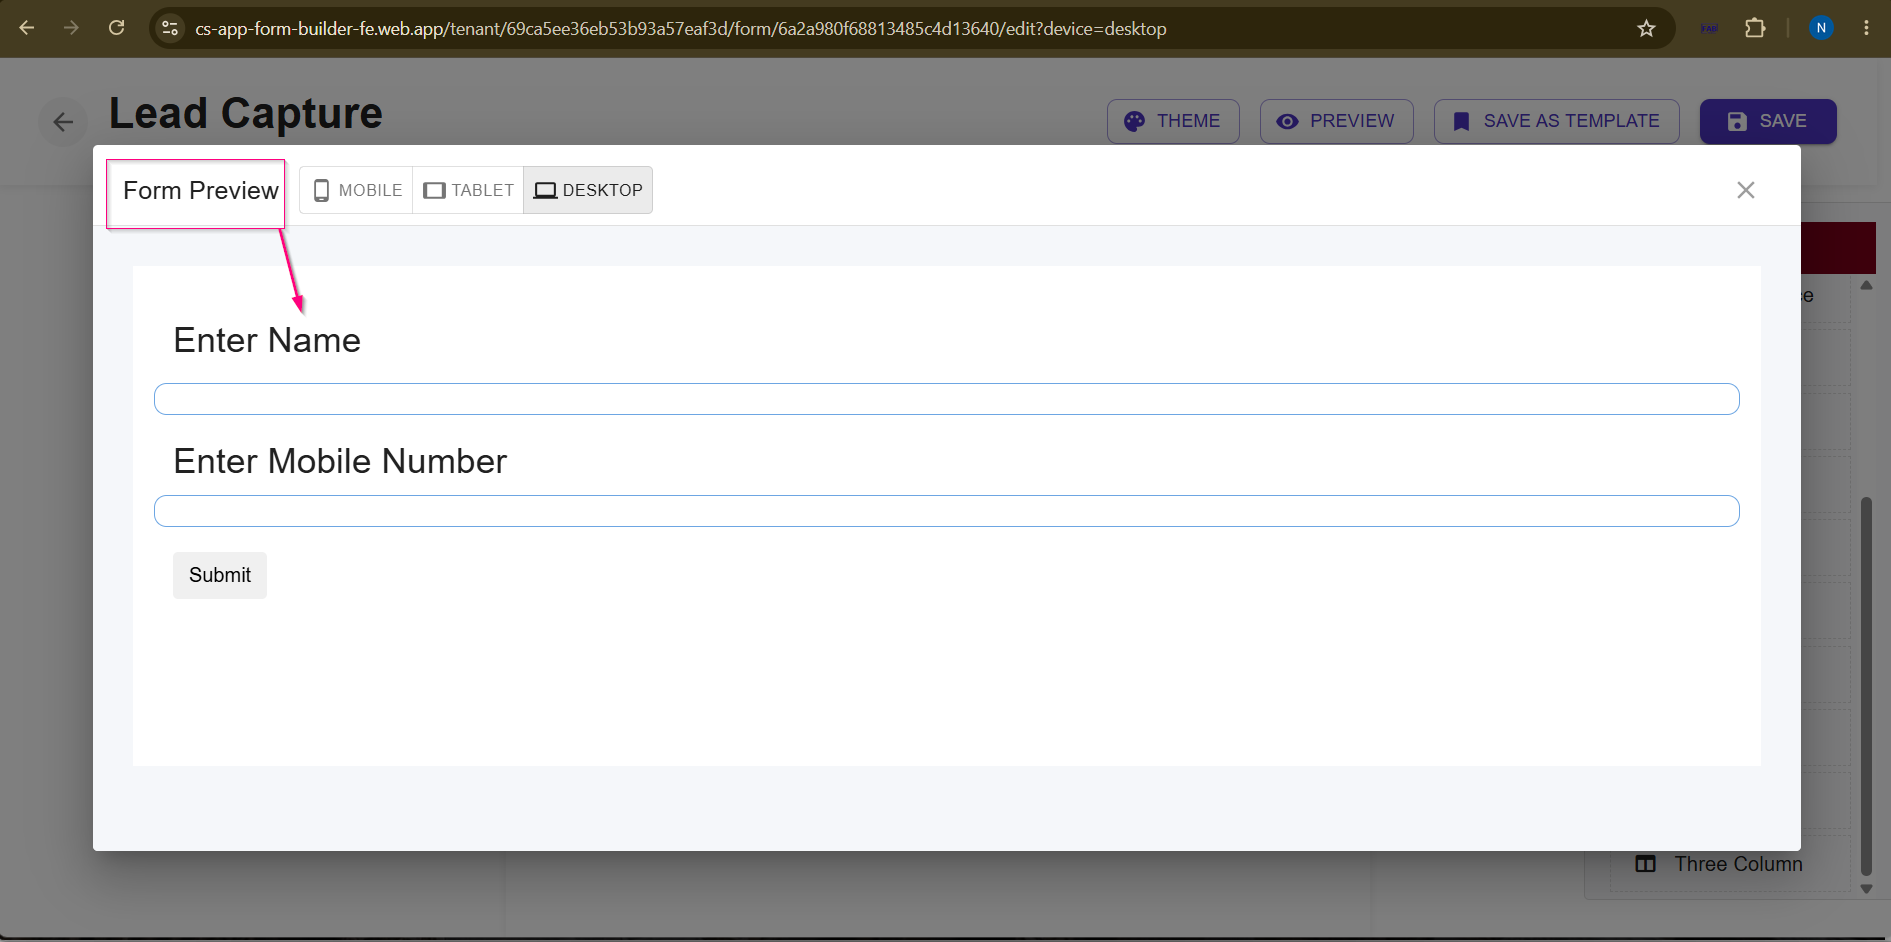 Screen- Form Preview
Step 15: Apply Theme(optional)User can apply theme if required.
Step 16: Save FormClick theSavebutton to save the form. The newly created form will be displayed in the Form Listing screen and will be available for publishing and lead collection.
Step 17: Save as Template (Optional)Click Save as Template to save the form design for future use. The saved template can be reused while creating new forms. 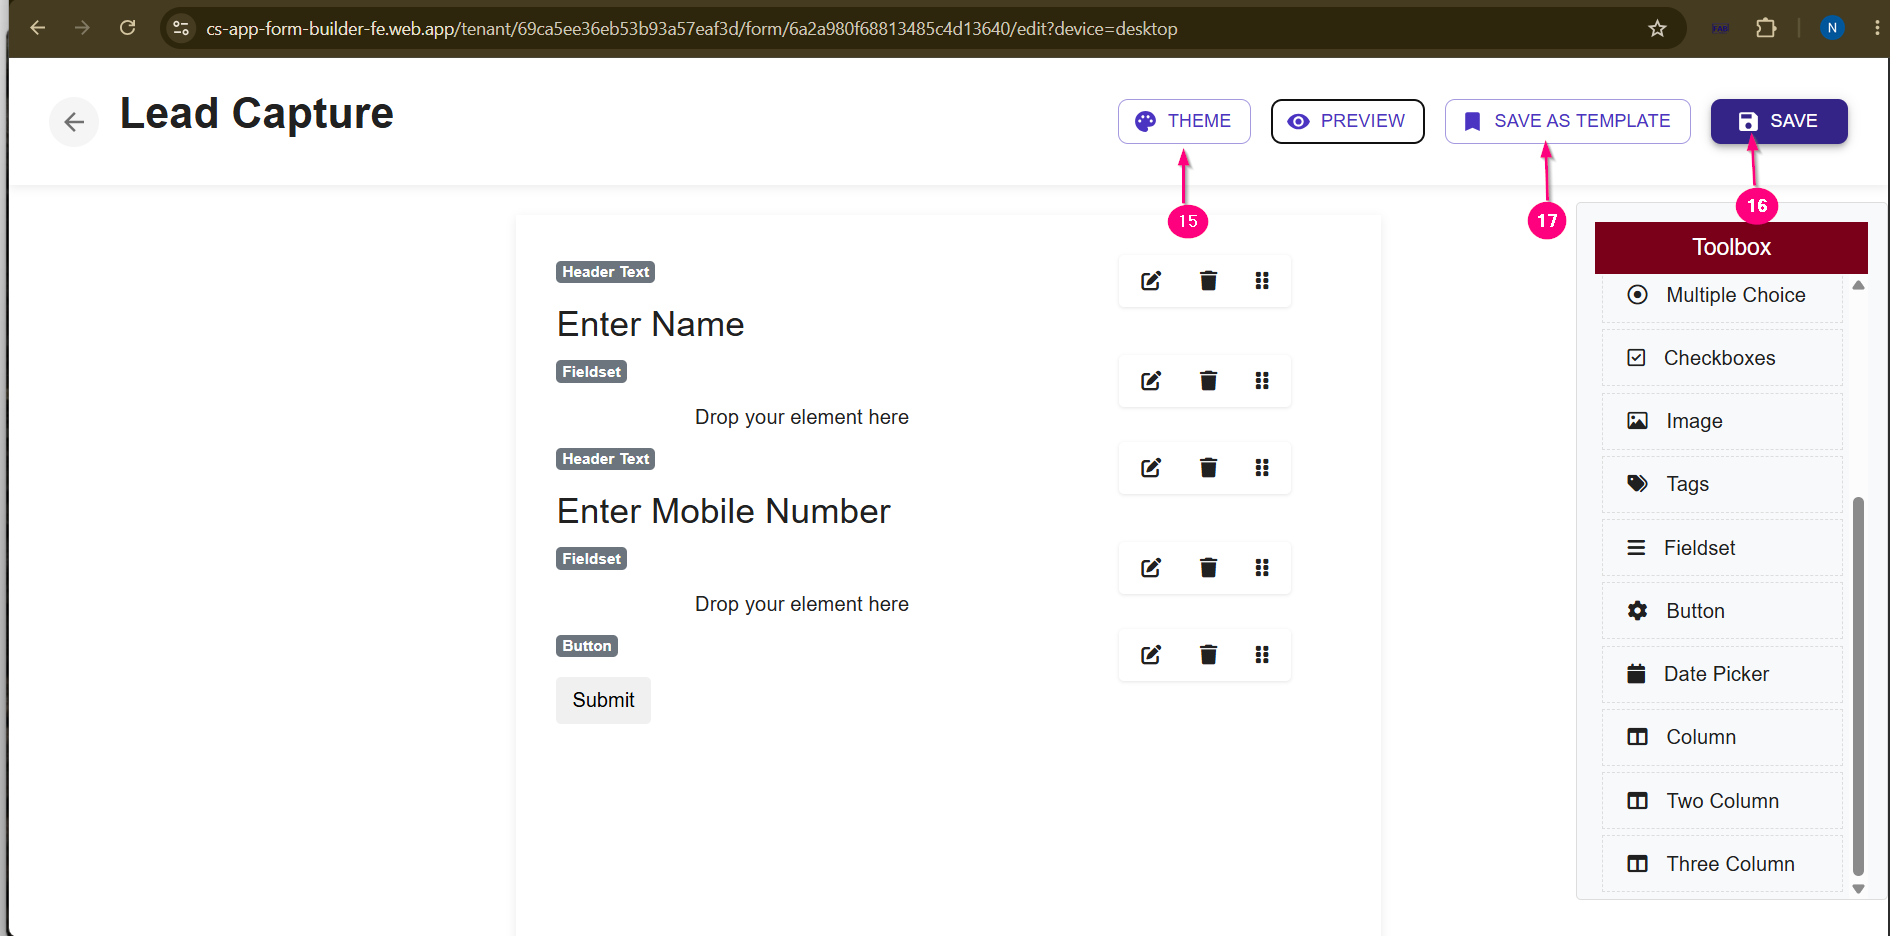 Screen- Save Form User can view the saved form on form dashboard screen. 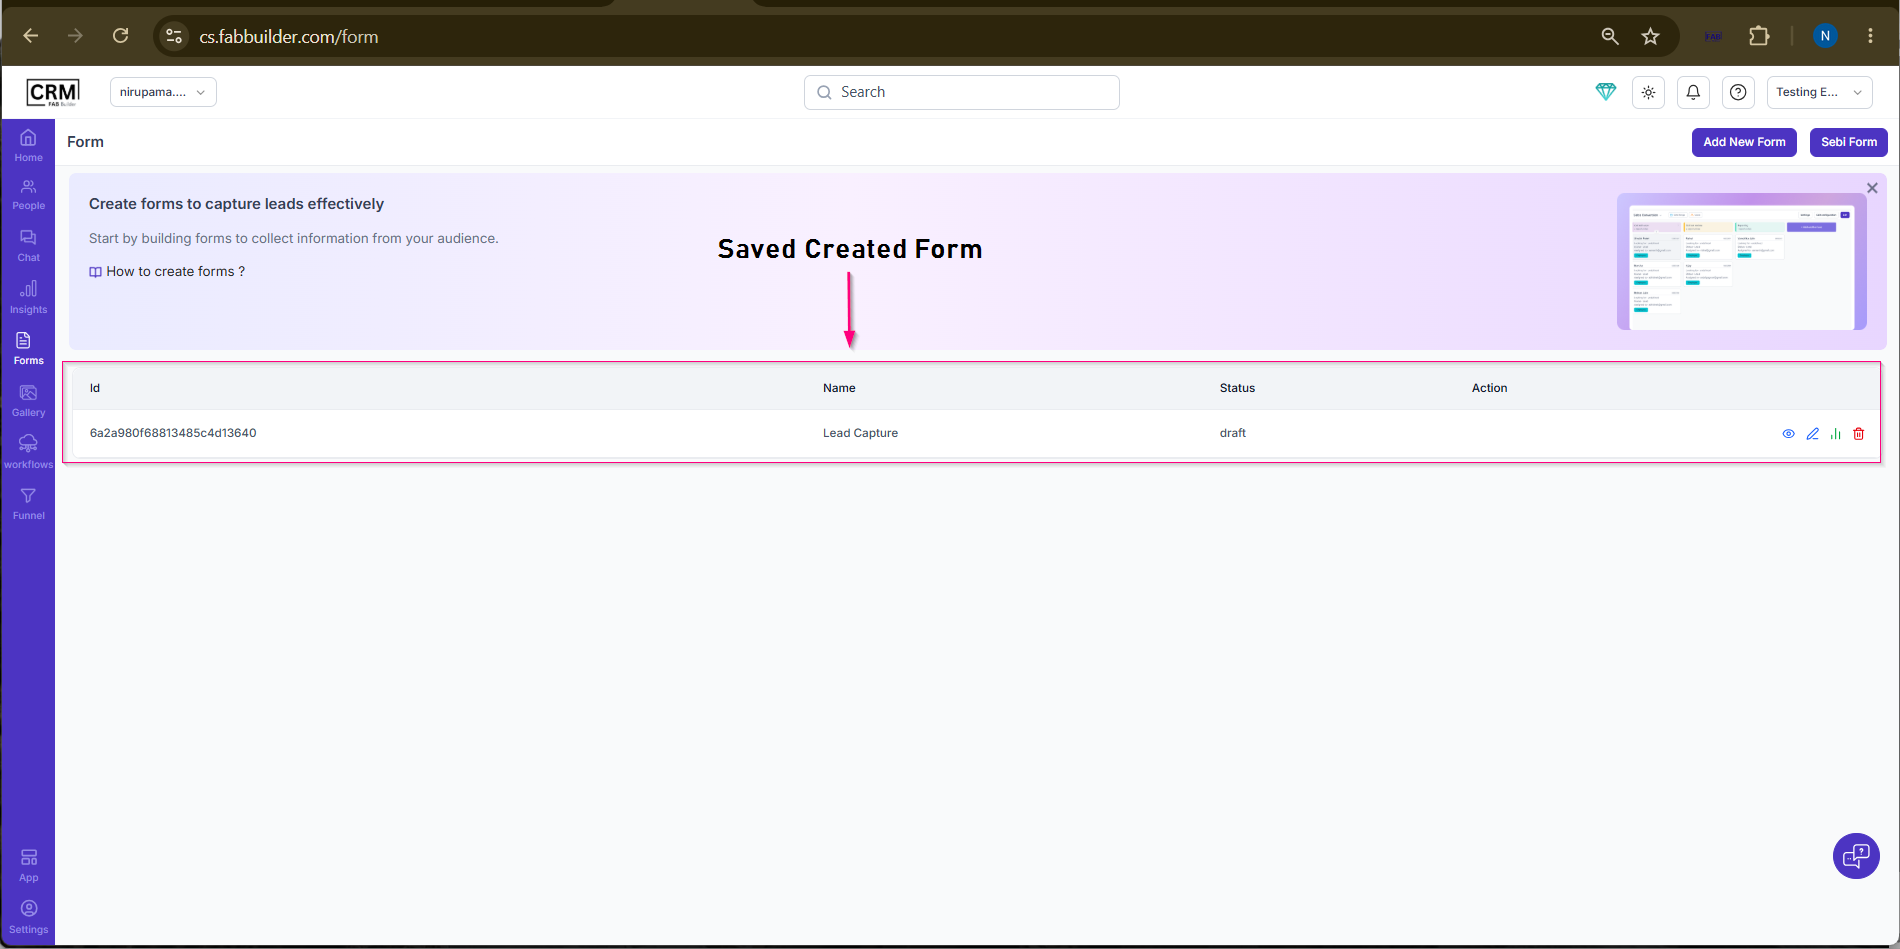 Screen- Created Form |